THE PROJECT I'VE BEEN WAITING 6 YEARS FOR... GREAT ROOM BEAMS!
The Project I've Been Dreaming About For 6 Years!

One day in December a couple weeks before Christmas Ryan came to me and said "Do you want Beams?" I've only been dreaming and begging for beams in the Great Room for over 6 years!!! Best Christmas surprise there ever was!
When we put the Great Room addition on 6 years ago, we put studs in the ceiling knowing we would do beams someday, I didn't think it would take 6 years LOL but life happens ya know. But it was finally time and I couldn't be more excited!
This is my vision I created to get my vision out on screen! EEEKKK!!
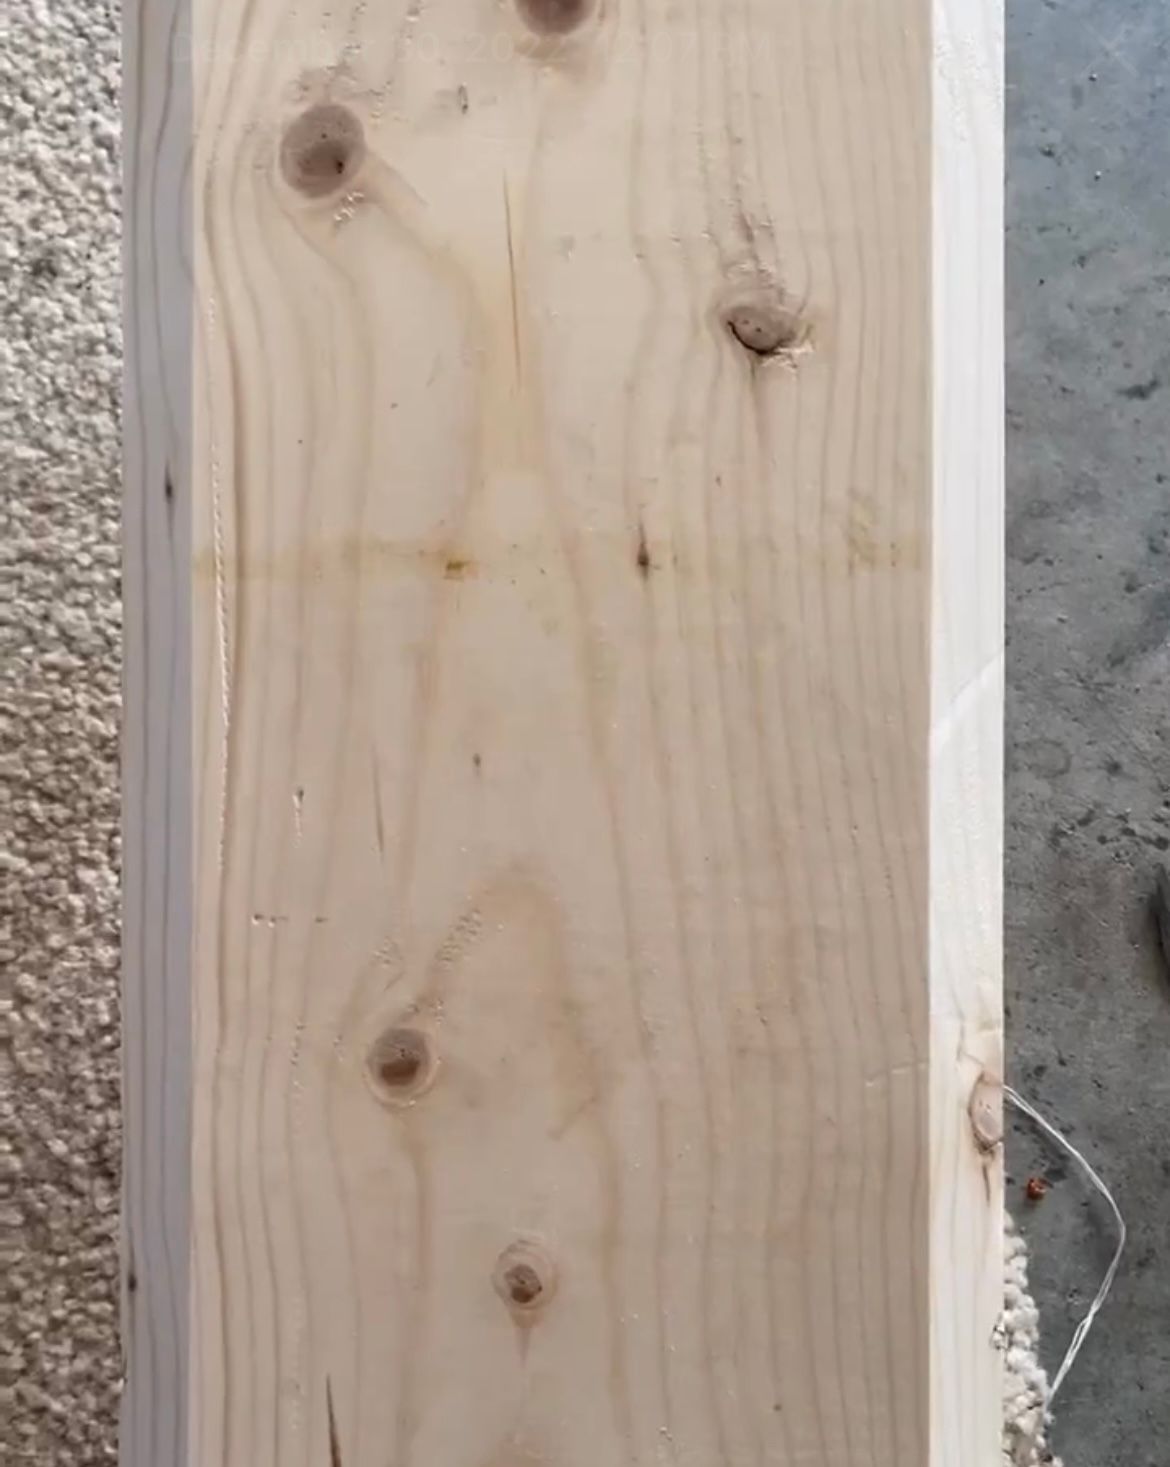
So the process started and we needed to decide how/what size we were going to do them. Ryan voted 6" wide, more shallow. I voted 8" wide, thinking deeper more dramatic. So we did a mockup not 2 different sizes to visualize the 2 sizes.
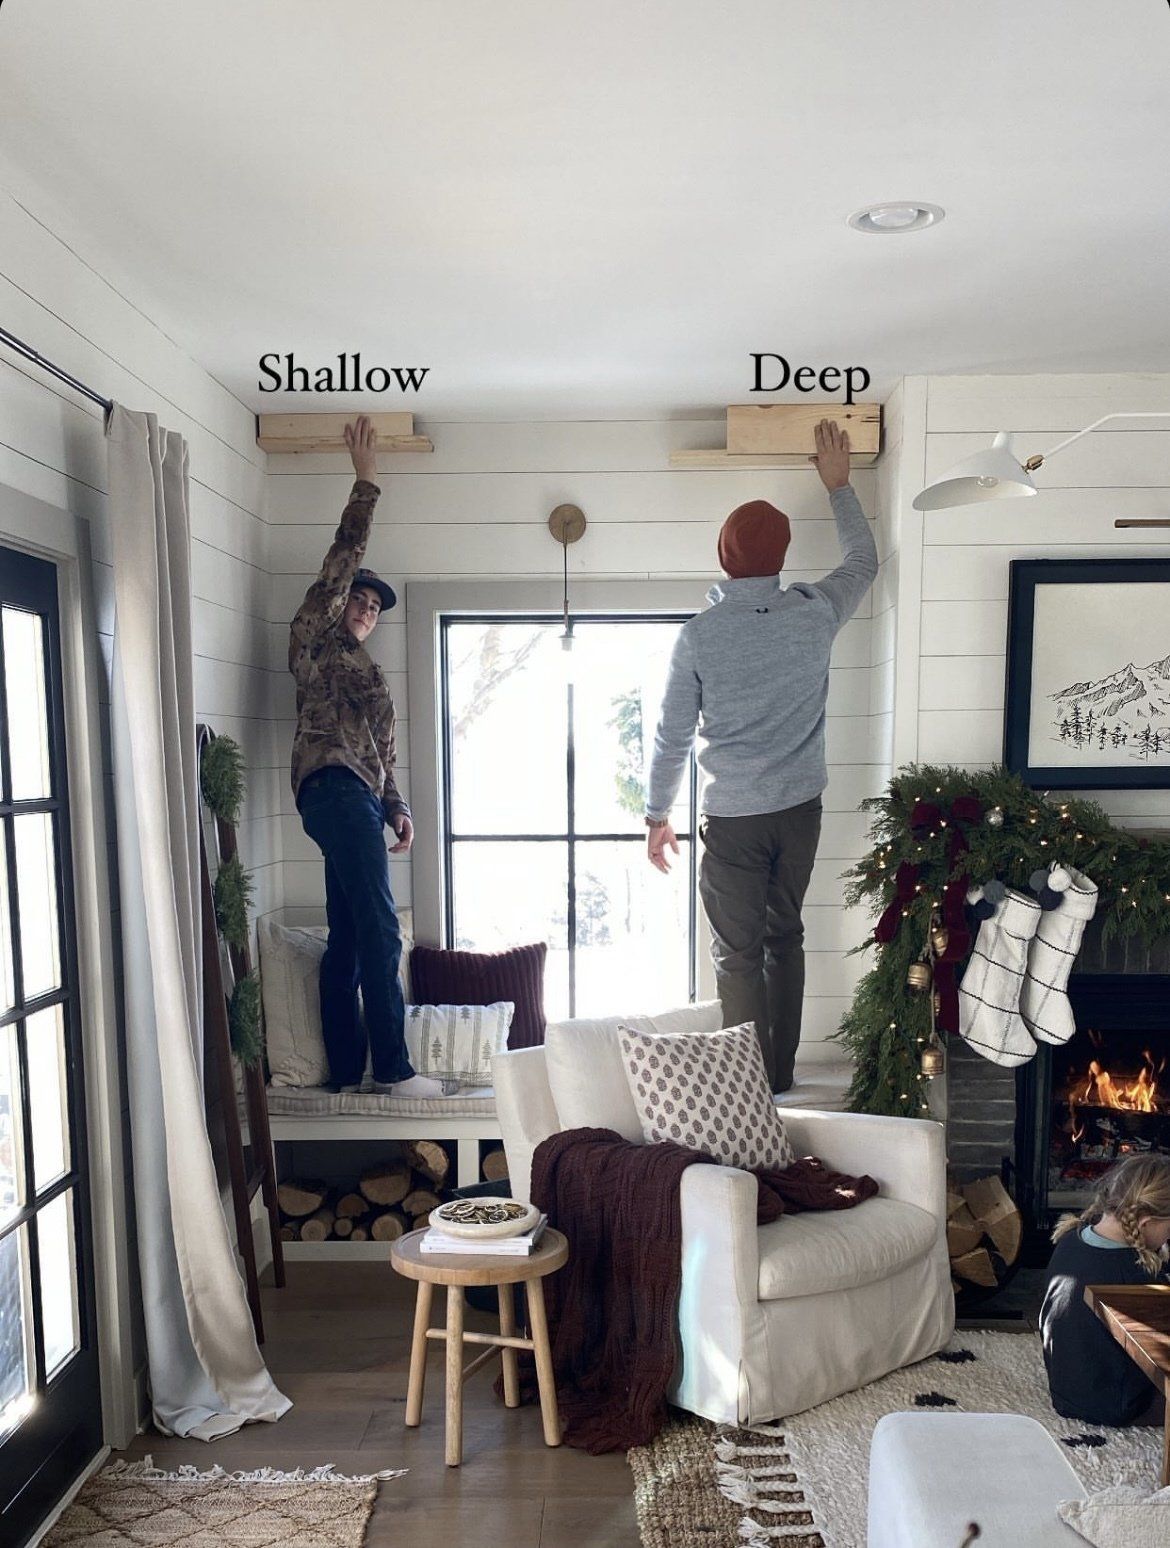
You can see the 2 options here. We have almost 9ft ceilings in here to note as well. We went with the deep option ;) The actual size ended up being 6" deep by 8" wide.
Let's Make Beams!
I wanted to write out a blog post on here for the step by step process of beam making but I also make a video on my Instagram for us visual learners so you could see exactly how we did ours! Click HERE TO WATCH THE VIDEO!


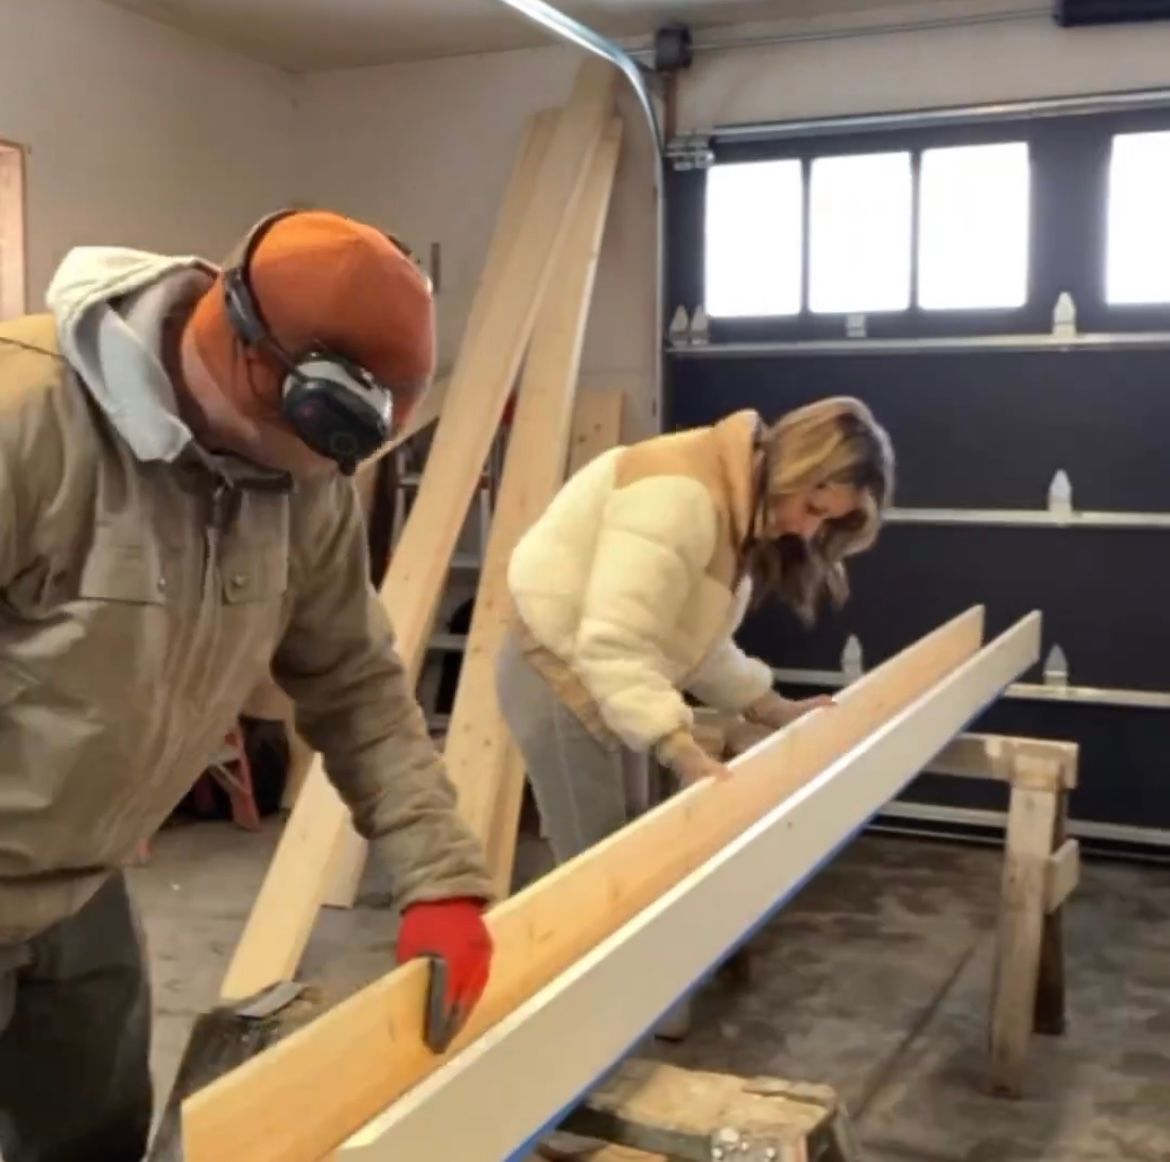
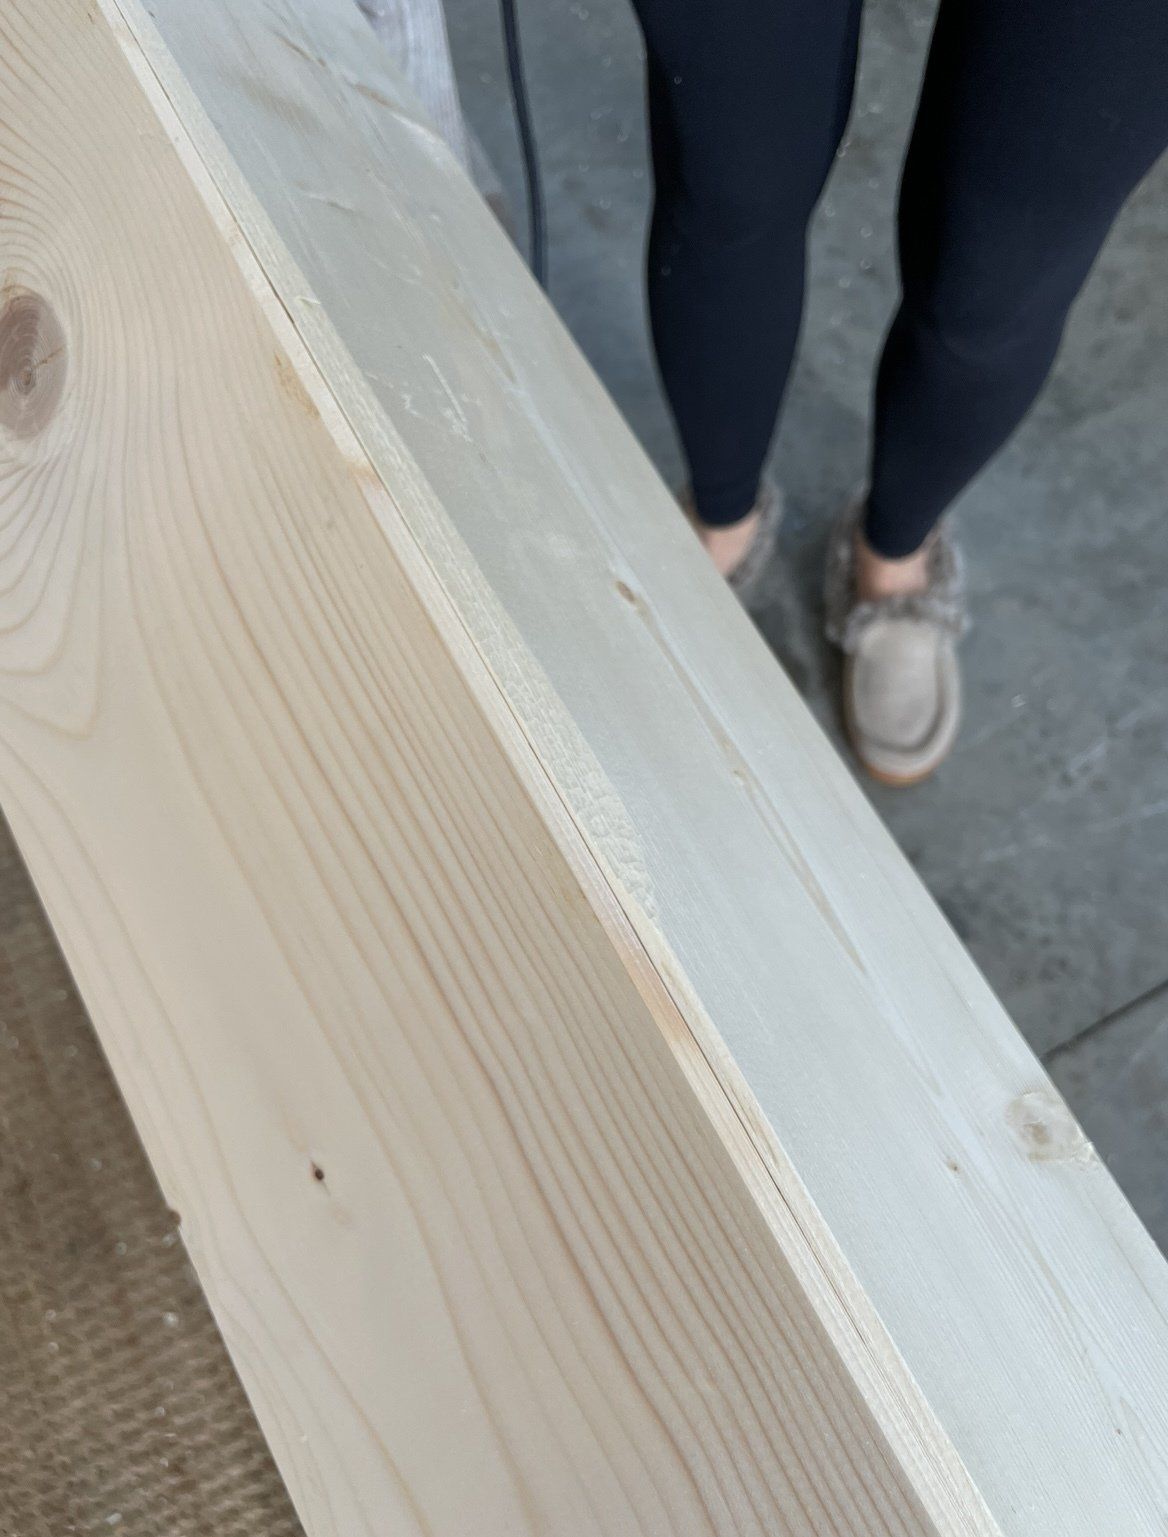
Before I share the step by step distressing part I wanted to show you how Ryan cut the sides at a 45 degree angle to make a seamless looking beam. You can see that in the photo below. Next, place them together upside down and take painters tape to tape the seams as tight as possible. With two people flip the boards and then use wood glue to add glue to the 45 degree cuts. We used a brush to brush the glue out for the best hold and then used the air nailer with 2" nails to hold them tight while the glue dried. Let them sit overnight to stick good and tight together!
After that you are ready for distressing!
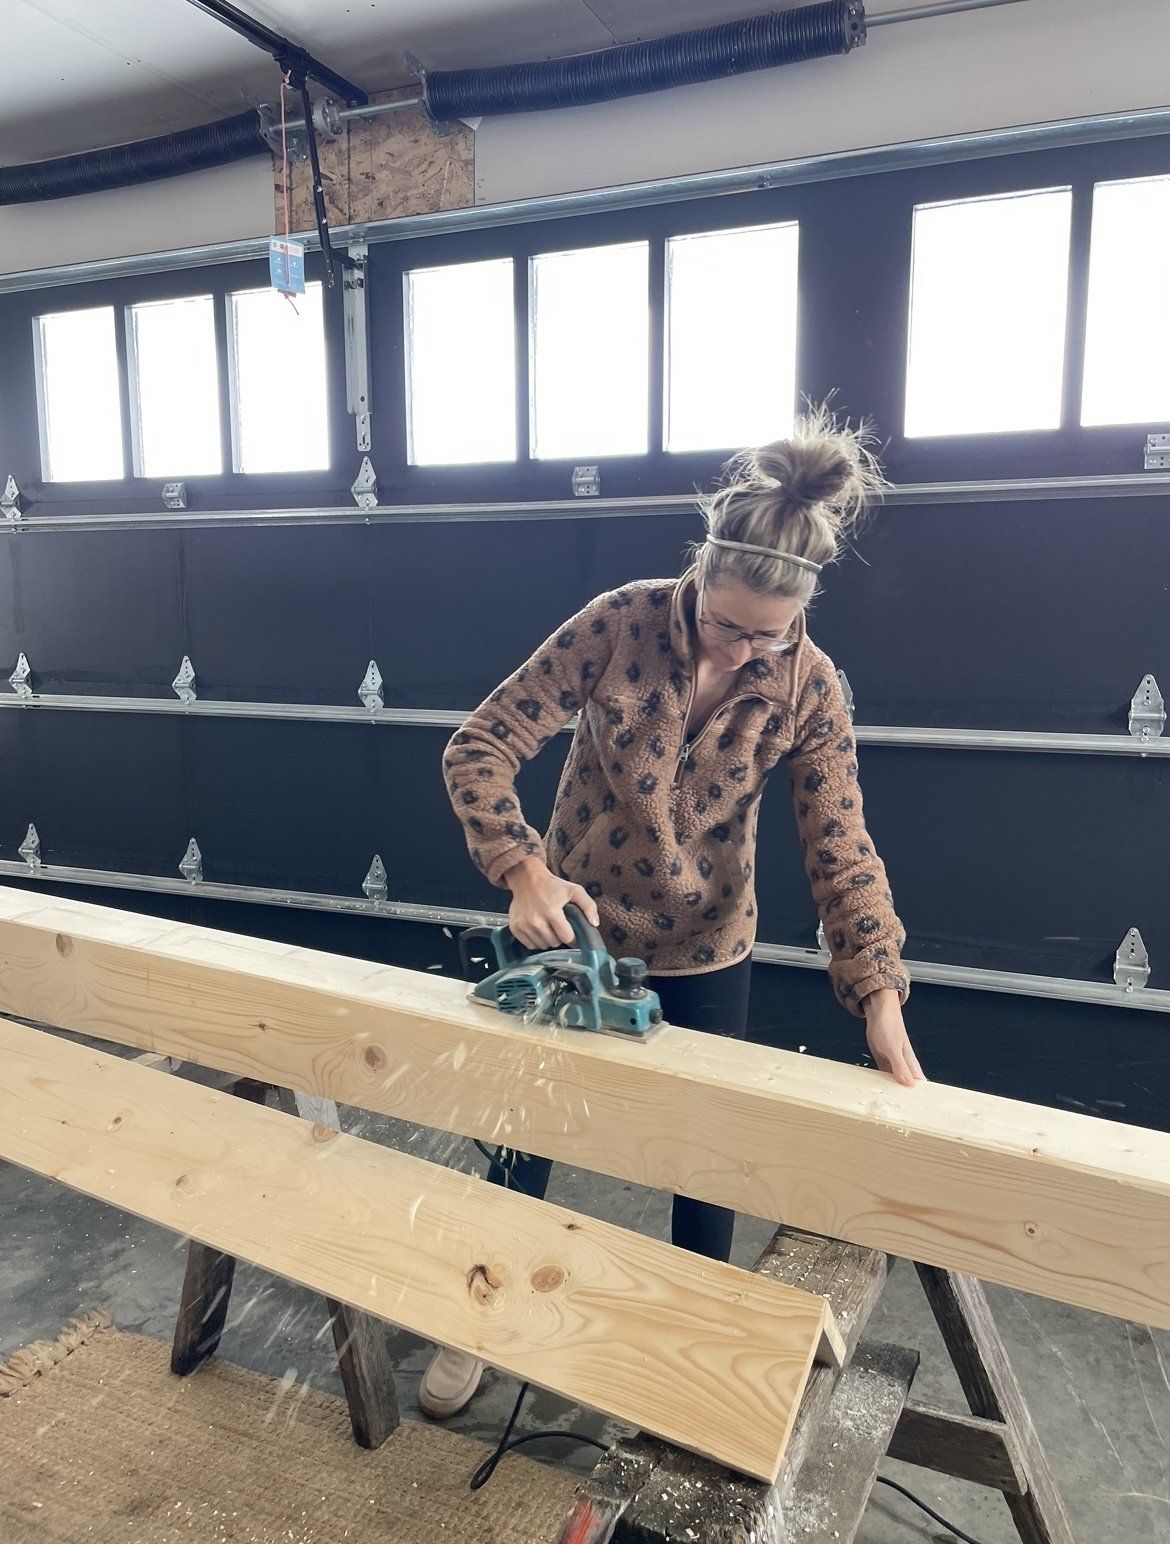
Step 1
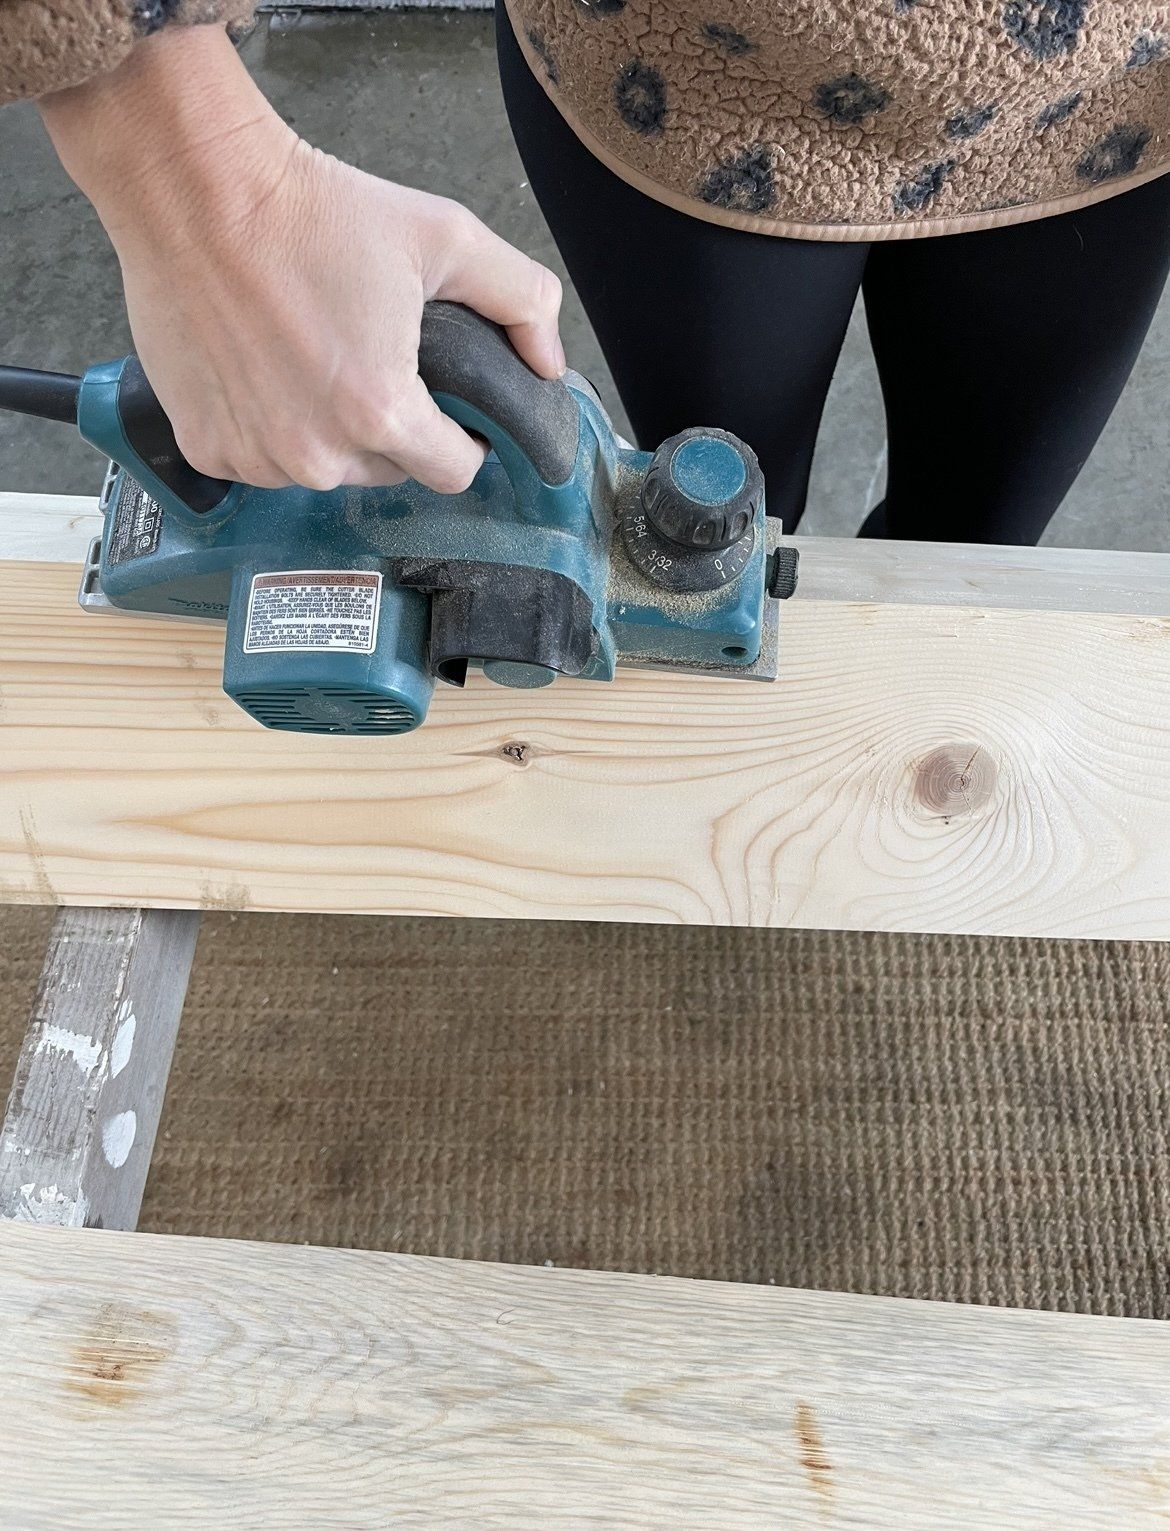
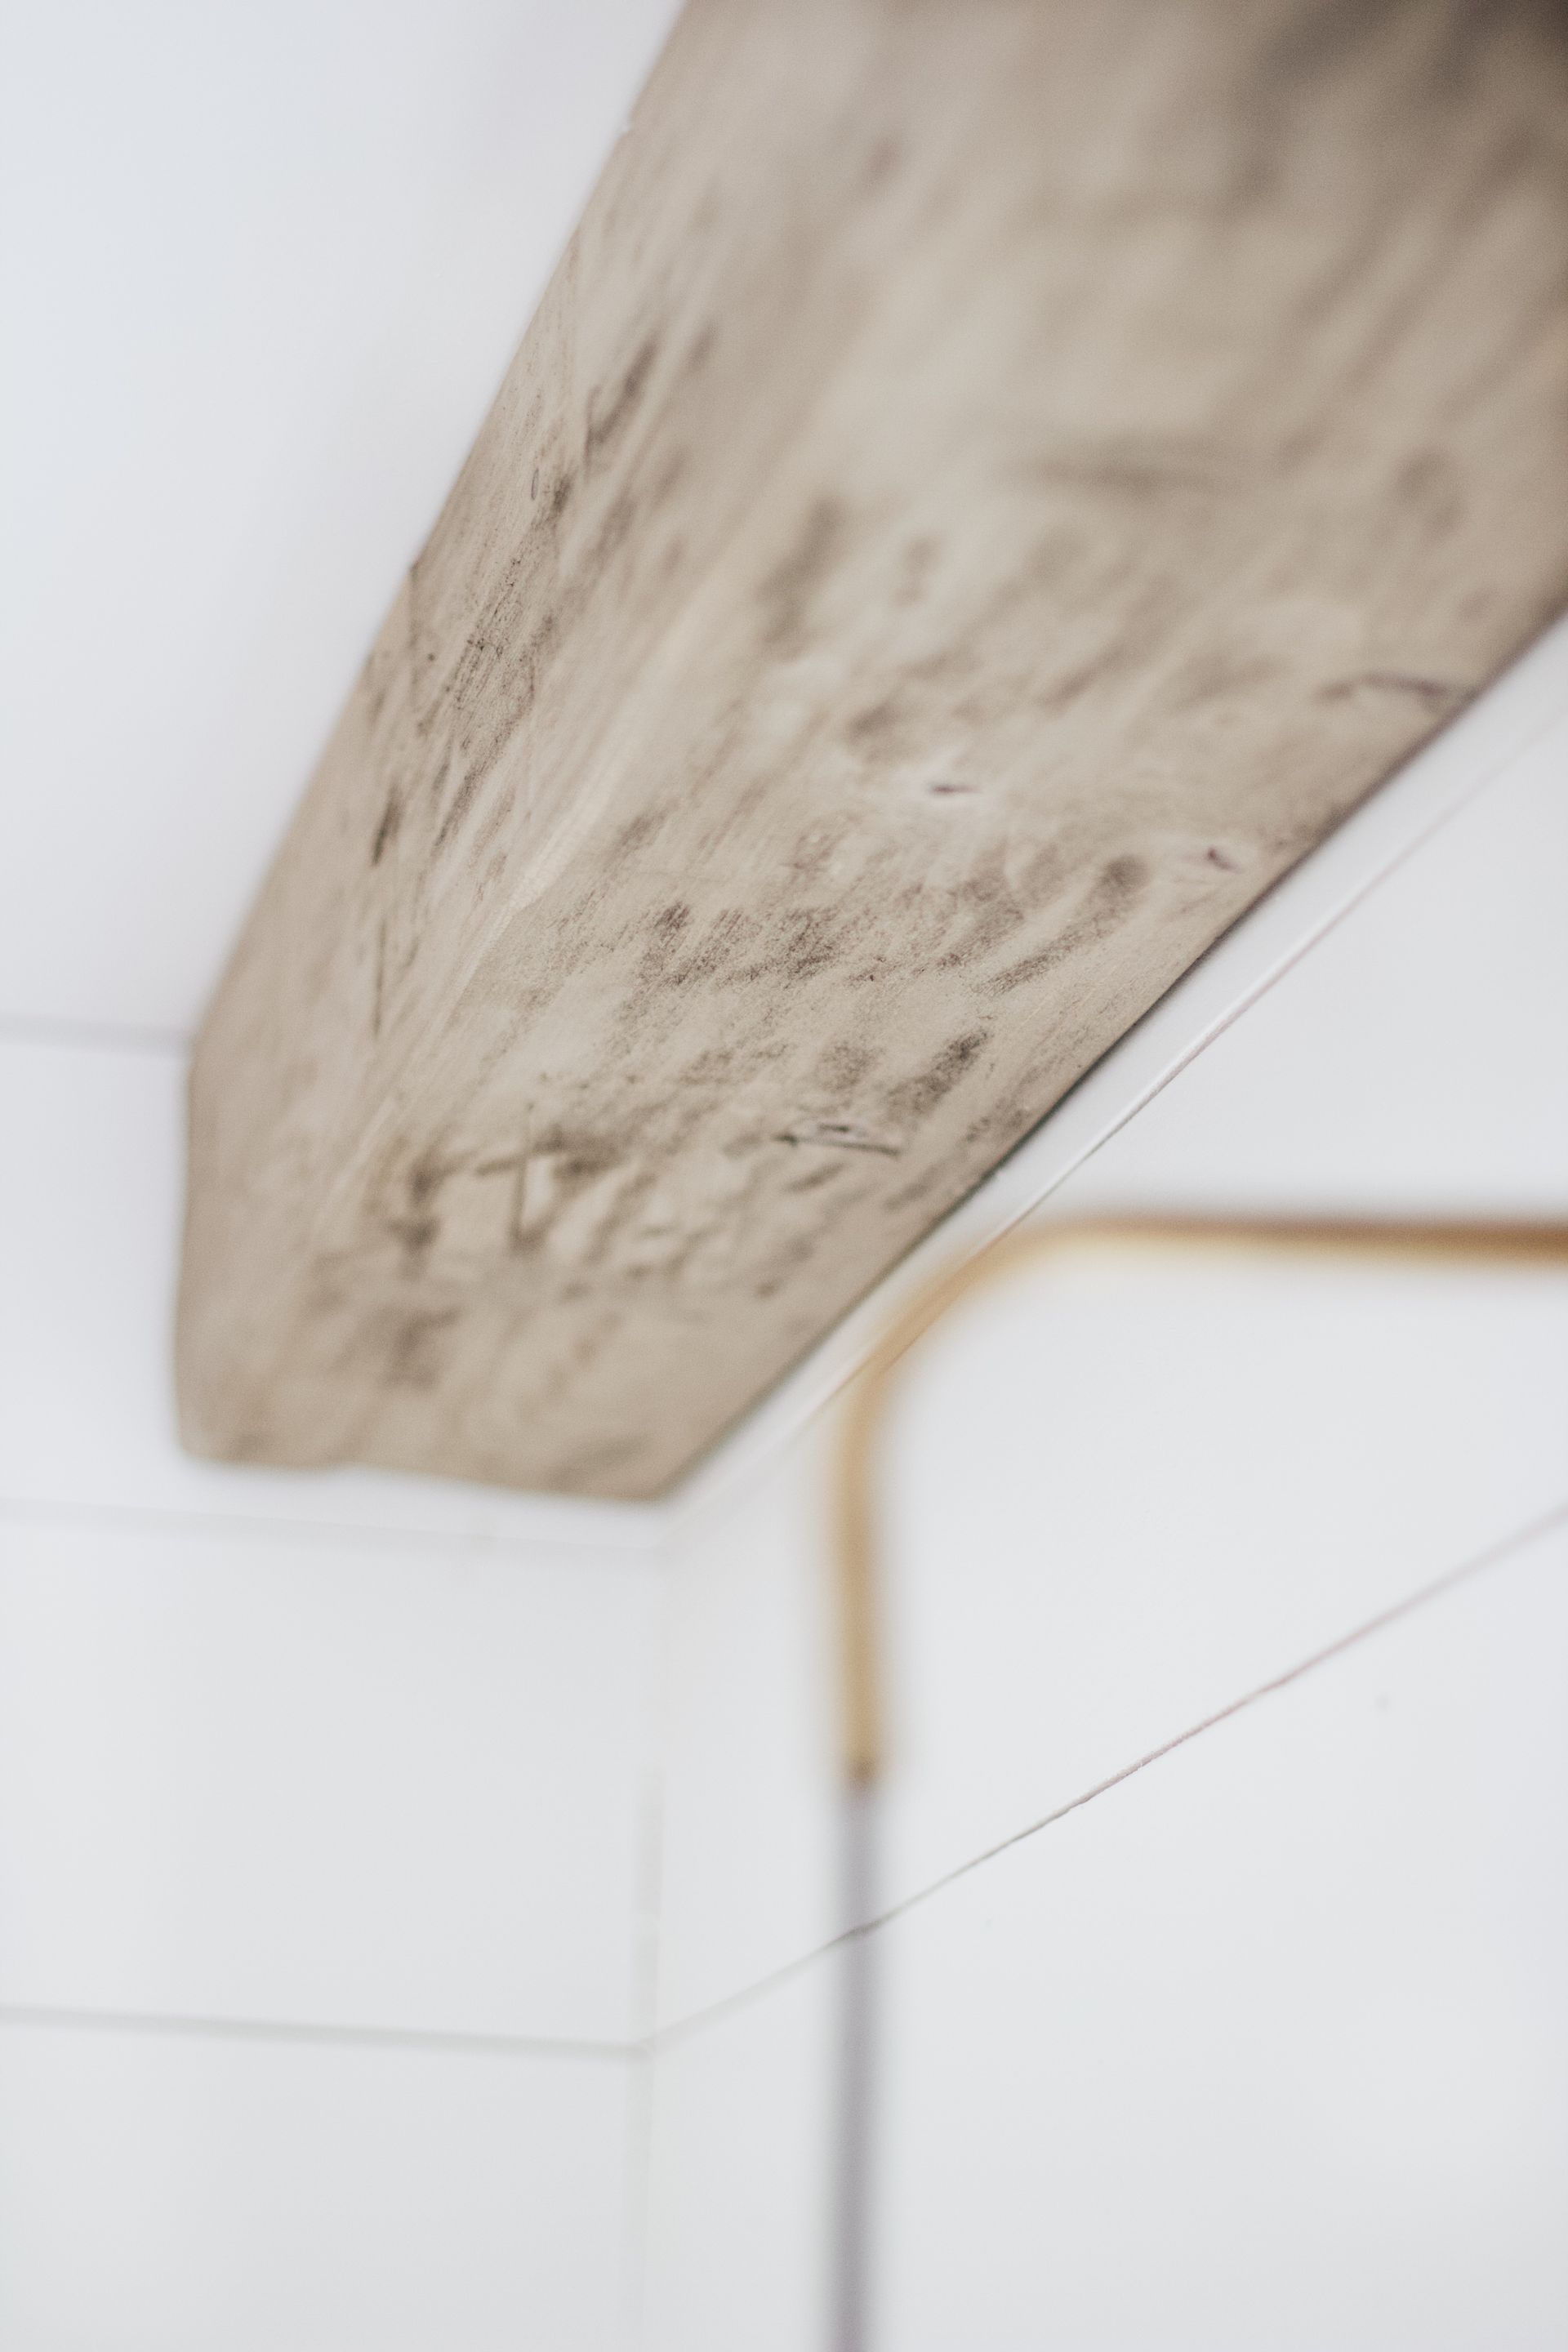
After the wood is assembled and put together how you want them, grab the Planer. This is a key tool in creating the roughed up, aged beam look. I start on the edges / tips.
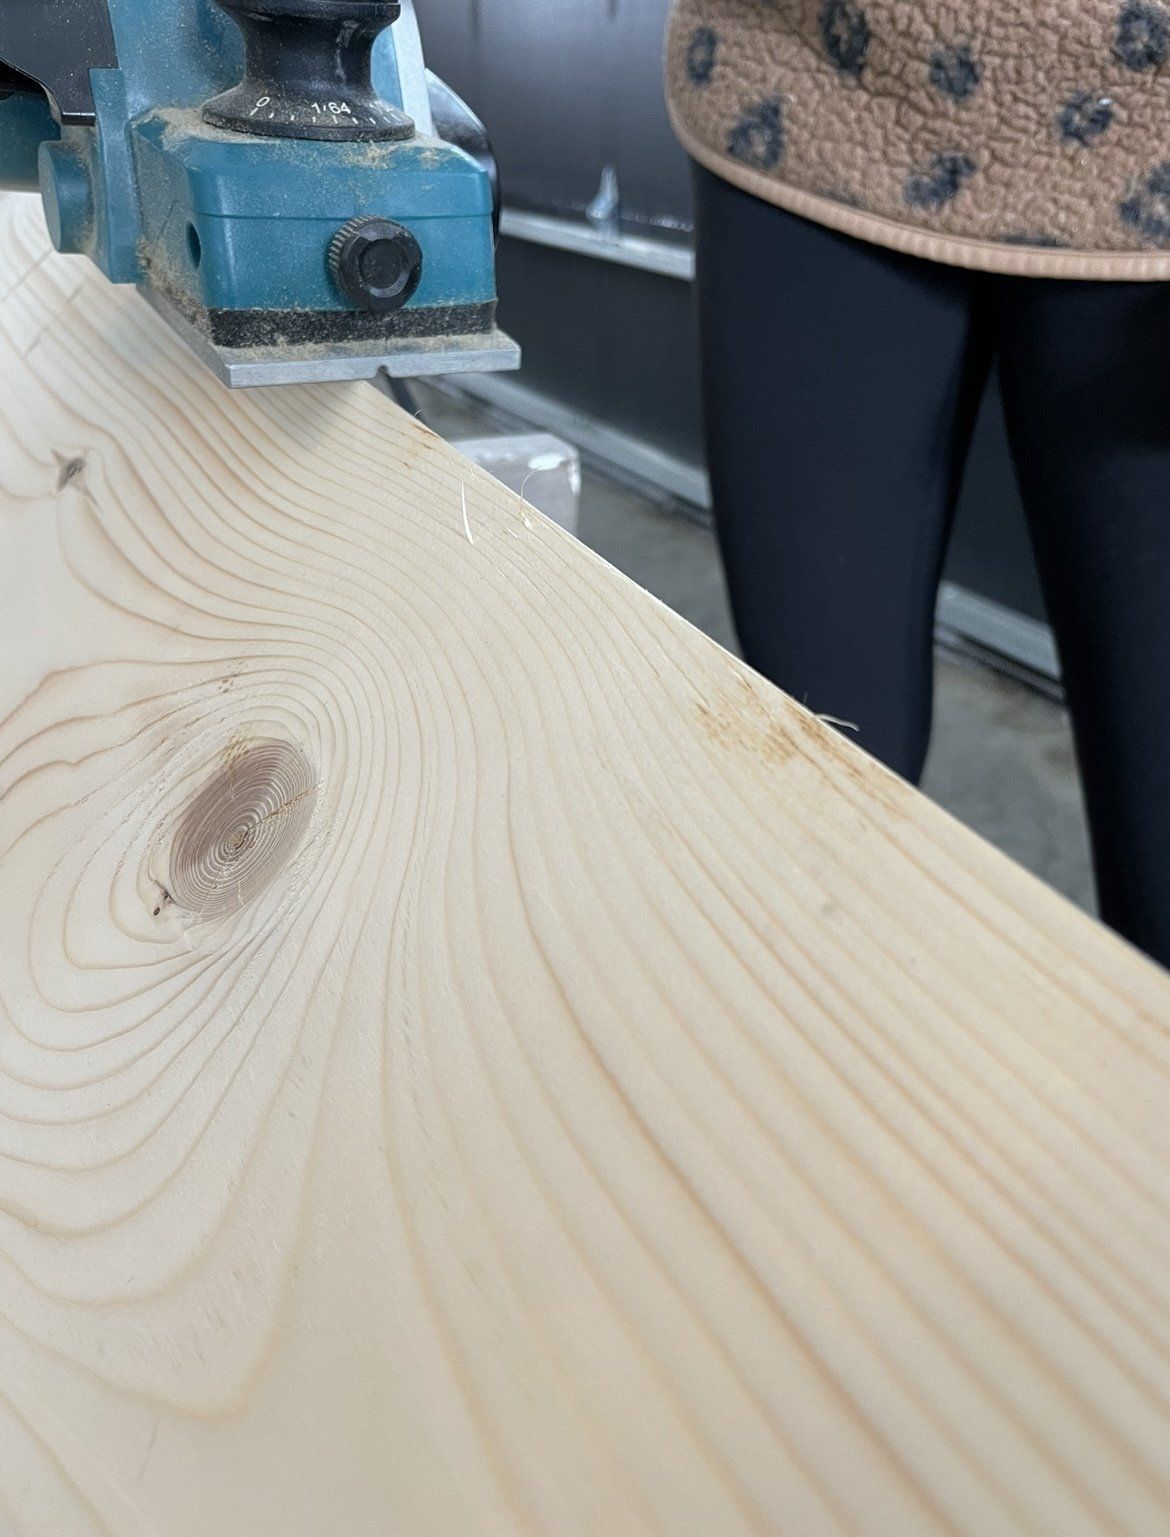
You really want to get rid of the crisp 90 degree edge you worked so hard to get, lol! You can now see after running the tool over the edge it is now rounded over and not pointed like shown in the previous picture. This instantly makes it look and feel like an old worn beam, exactly what you want!
Step 2
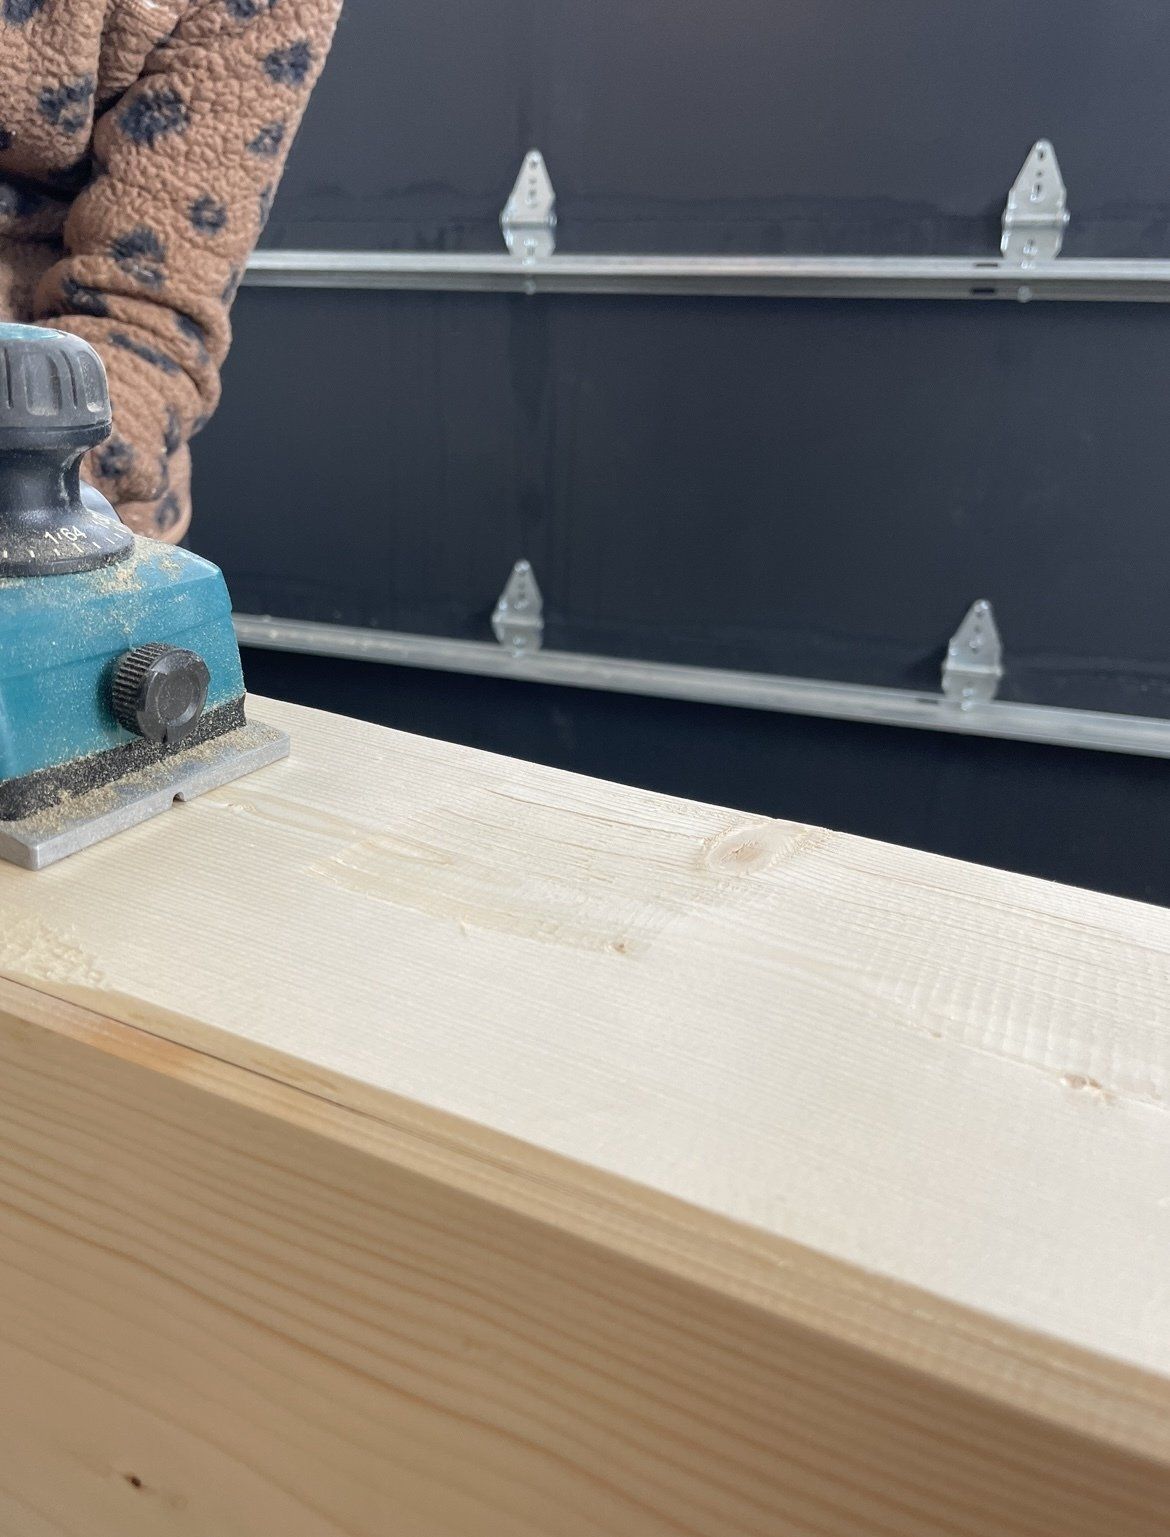
Continuing step 2 with the same tool. Roughing up the beam with going over to different part of the wood creating this divot. I run the planer lengthwise with the wood in about 8-10" lengths, and then I go against the grain to create deeper short 1-3" divots. You can't really mess this up, it's all adding character and making the wood look old.
Tip - do this in a garage or outside because this step spits out a lot of wood chips, as seen at that photo LOL!
Step 3
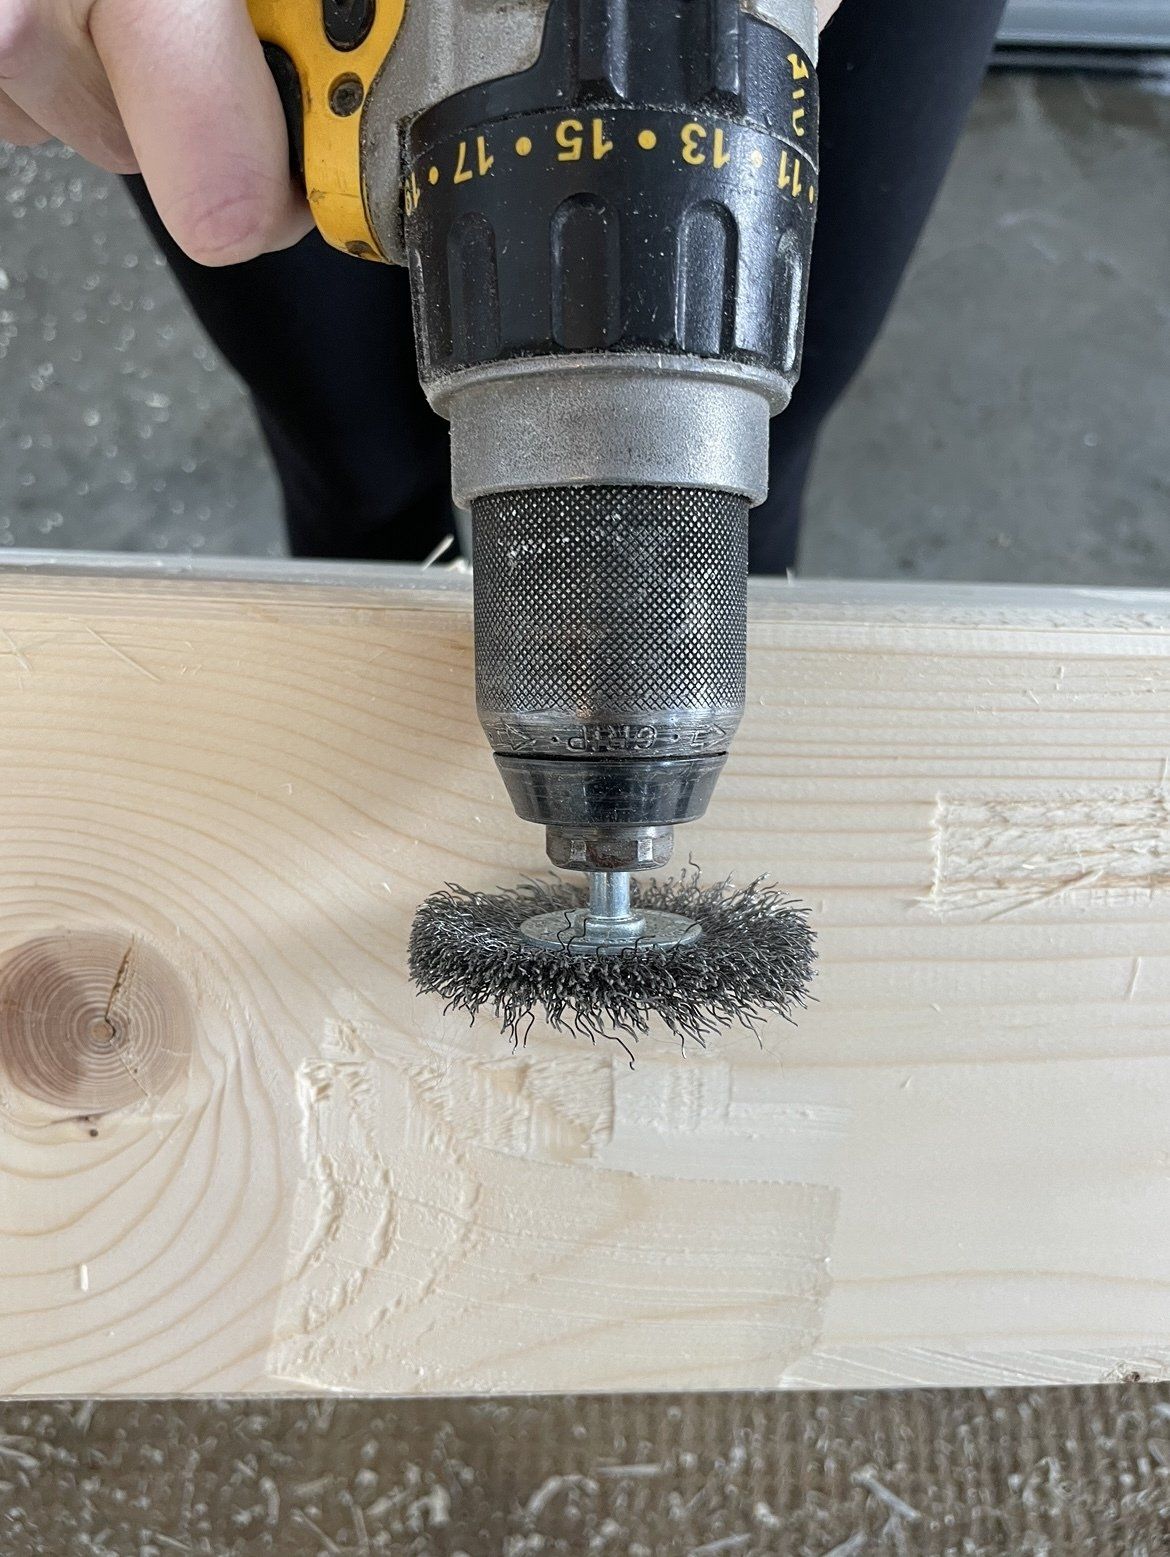

Next tool you'll need is a drill and an wire brush attachment. I use this tool 2 different ways during this DIY. First way in the long way of the beams. you want to go with the grain over the whole board. This takes out the smoothness and adds a lot of age as well. Just like the 2nd step I do this in different places throughout the wood and then go against the grain. I do these in smaller chunks usually being 1-3" again. It really is how you are wanting your beams to look and how much distressing you prefer. SO go with what you think you'll want.
Step 4
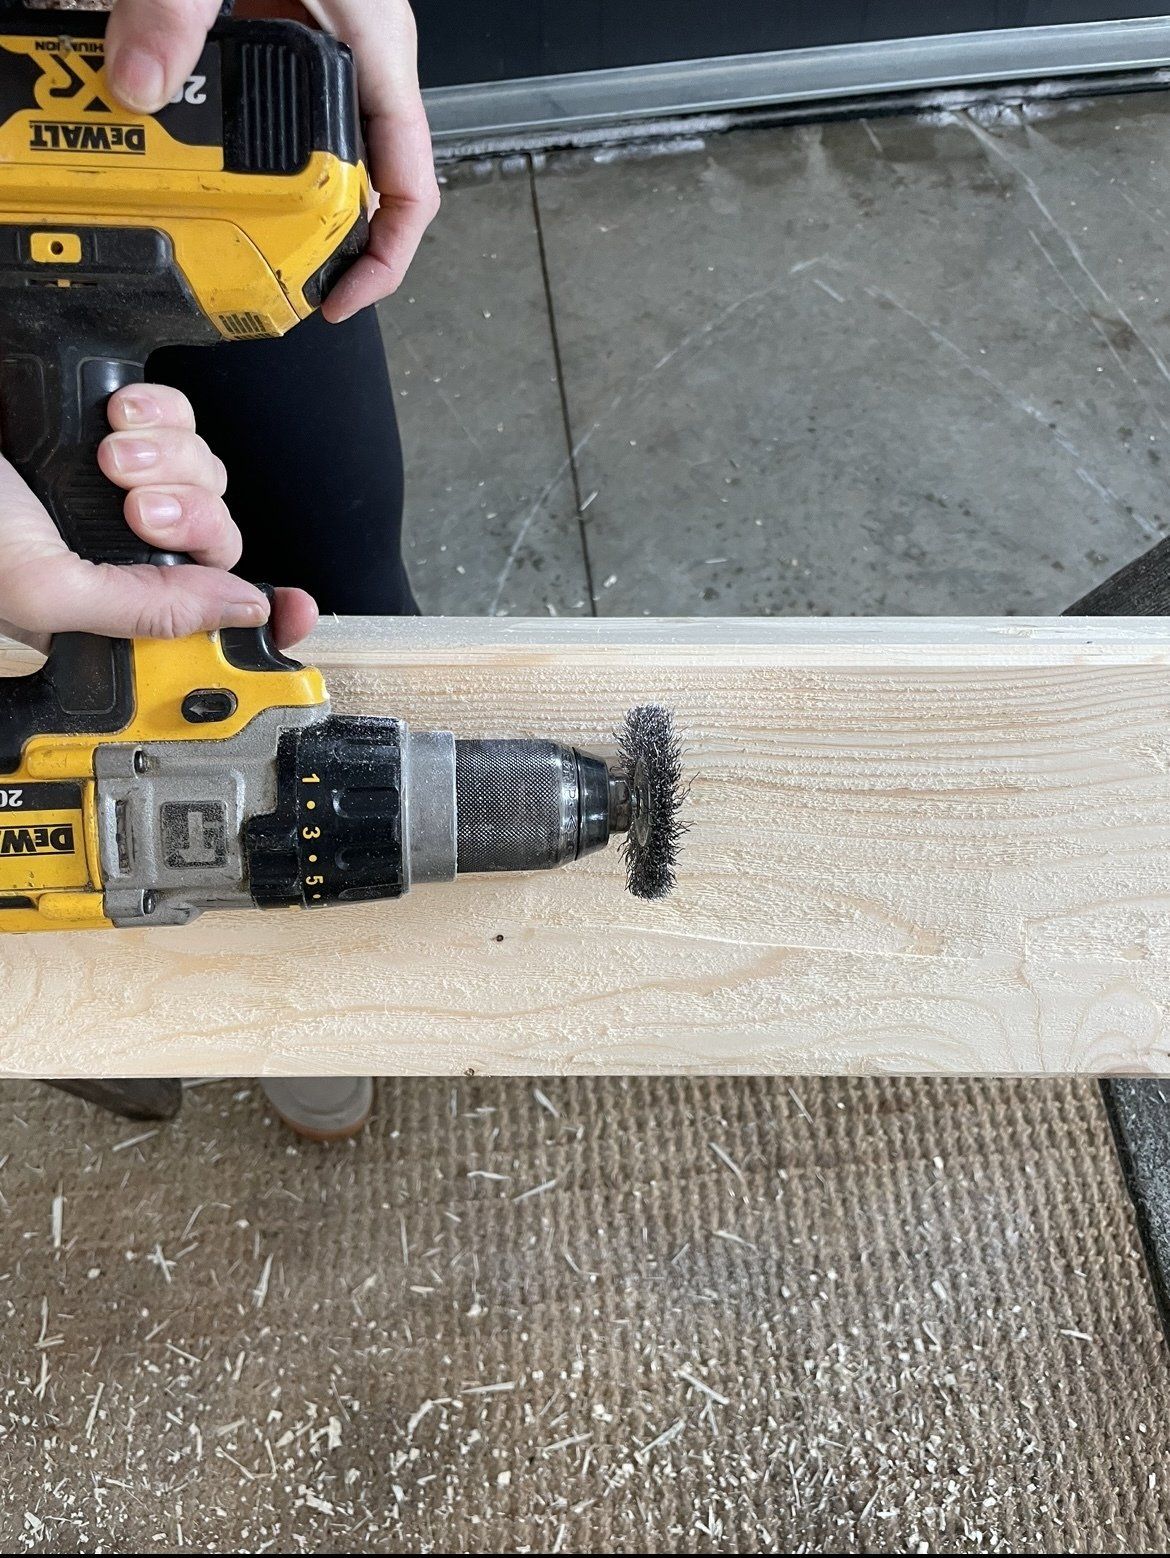

Creating these deeper grooves helps the stain to soak in more and it will create more dimension in the finishing steps. You just want to make sure to not create to deep of lines when you are doing the whole length of the board. We learned that the hard way on one board when we switched to a narrow wire brush. The wider the wire brush the better as you really just want to rough the wood up and not make deep trails in it.
Step 5

Sander. Sand the entire exterior of the beams.
Step 6
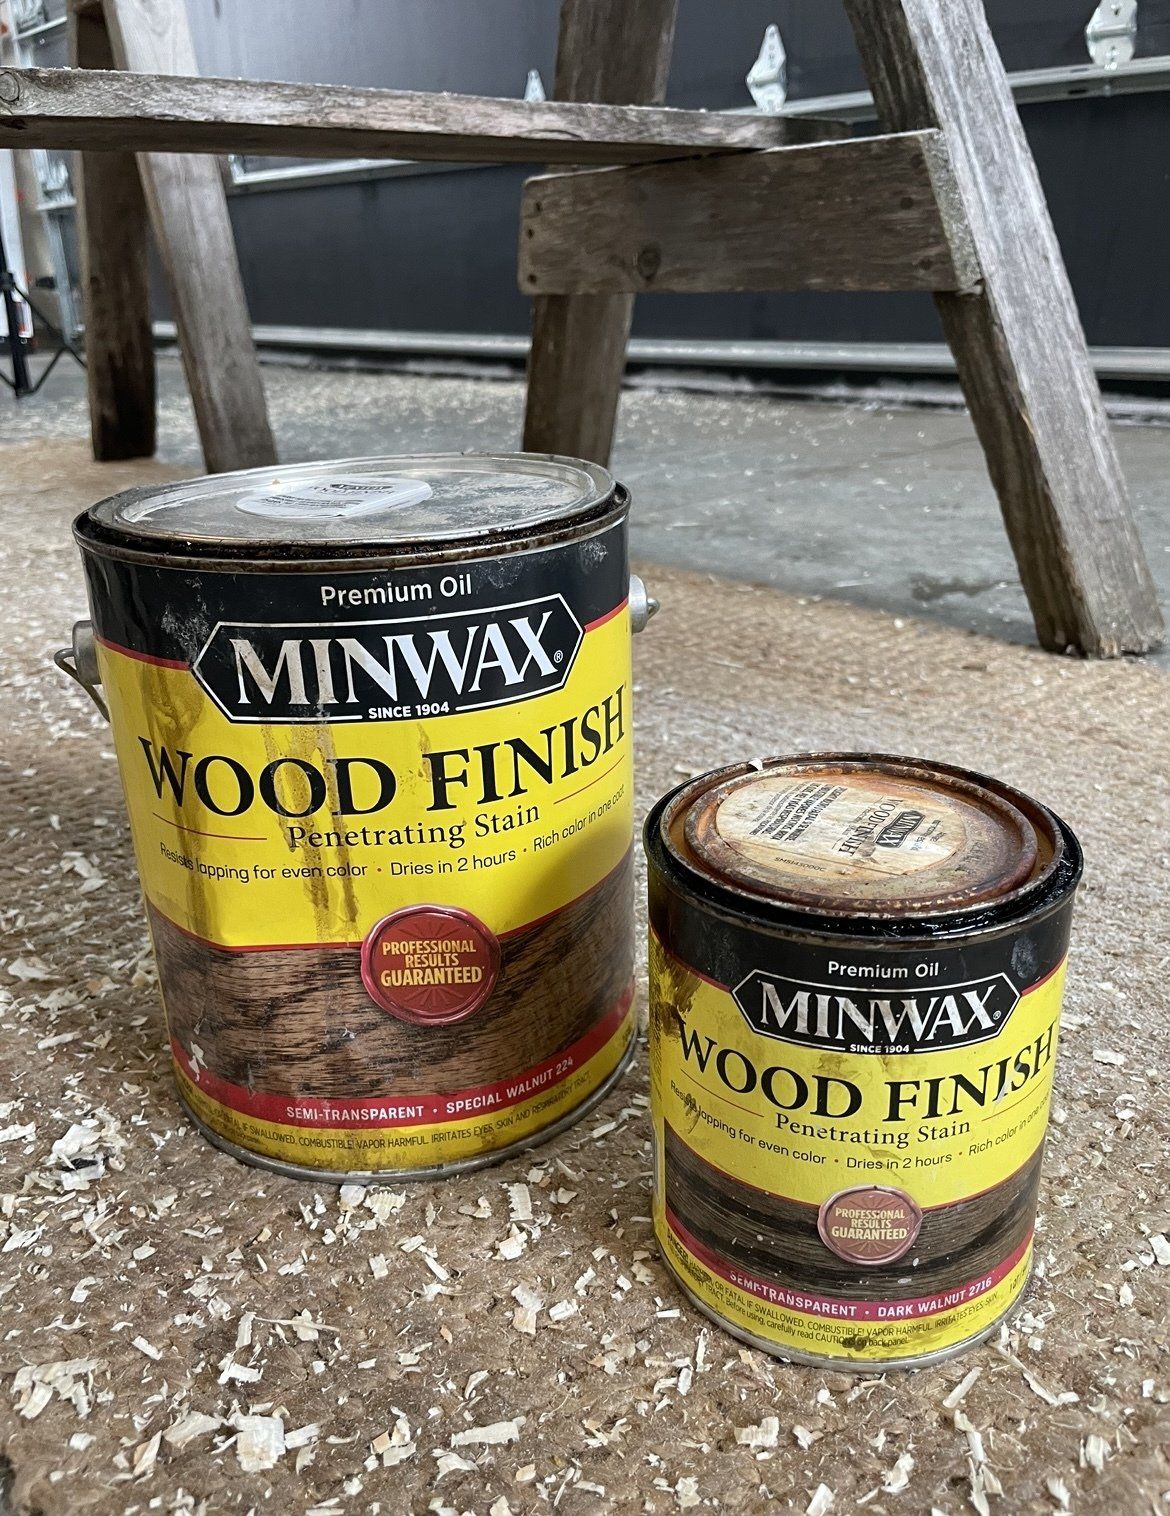

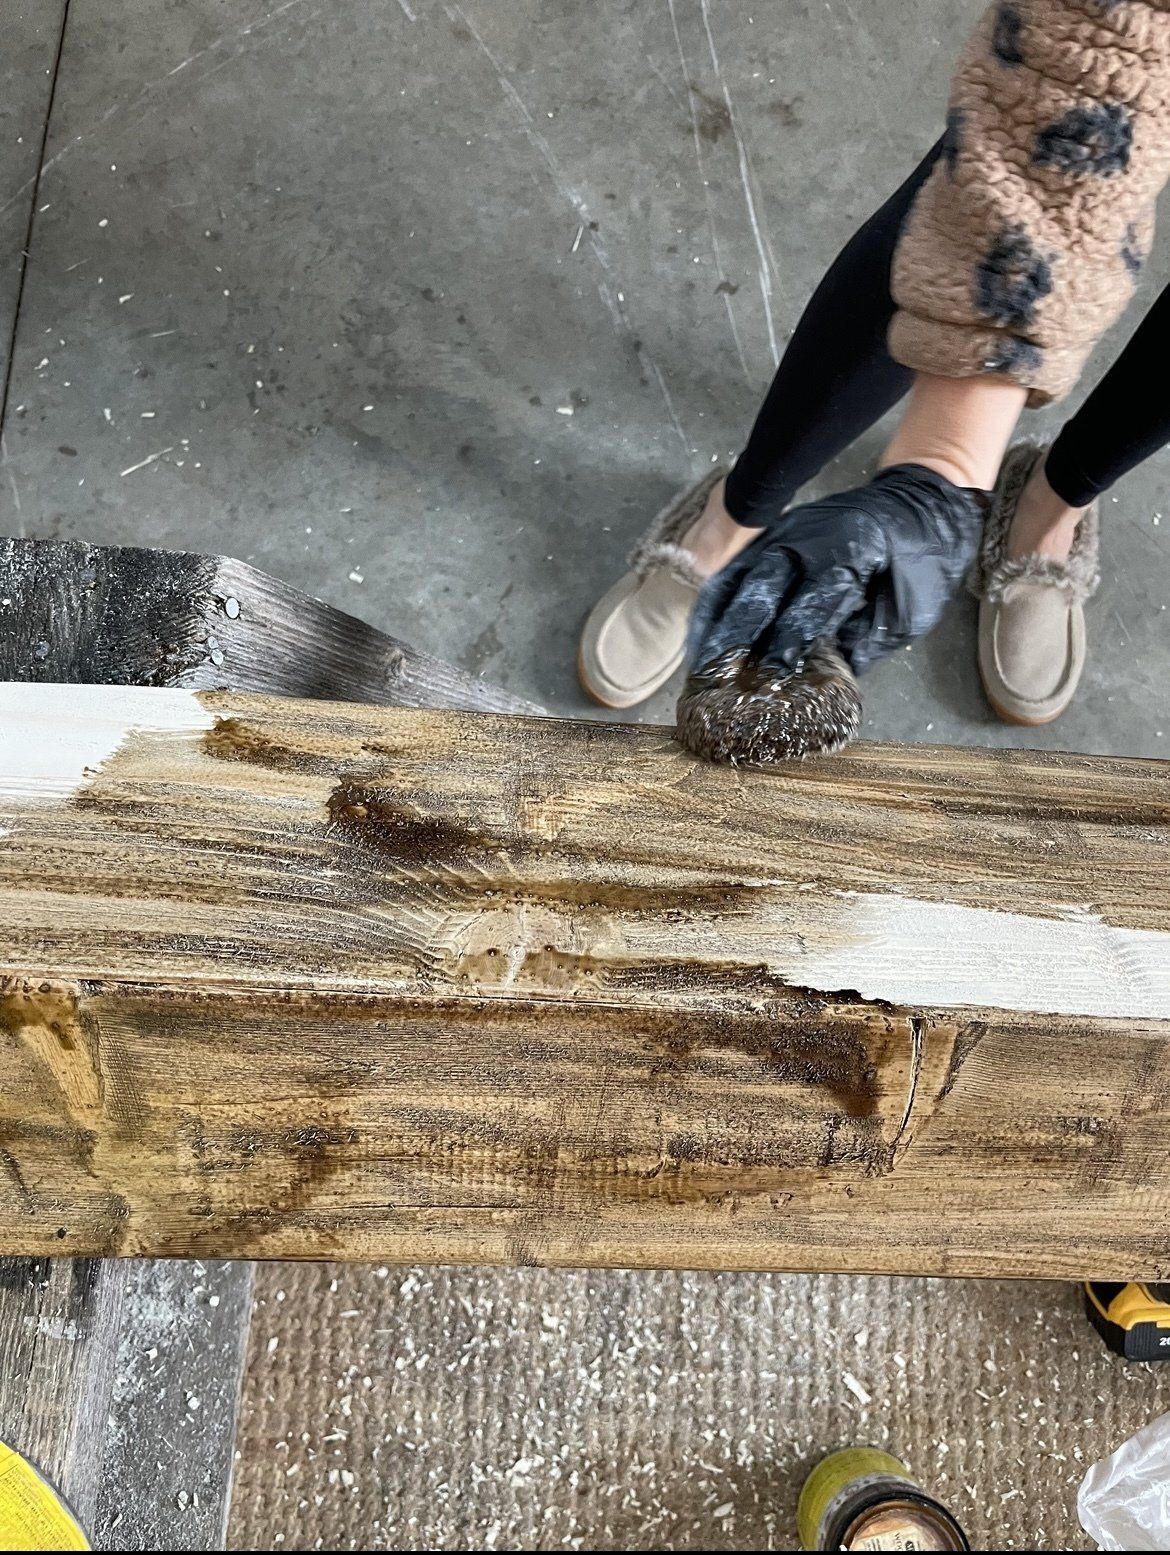
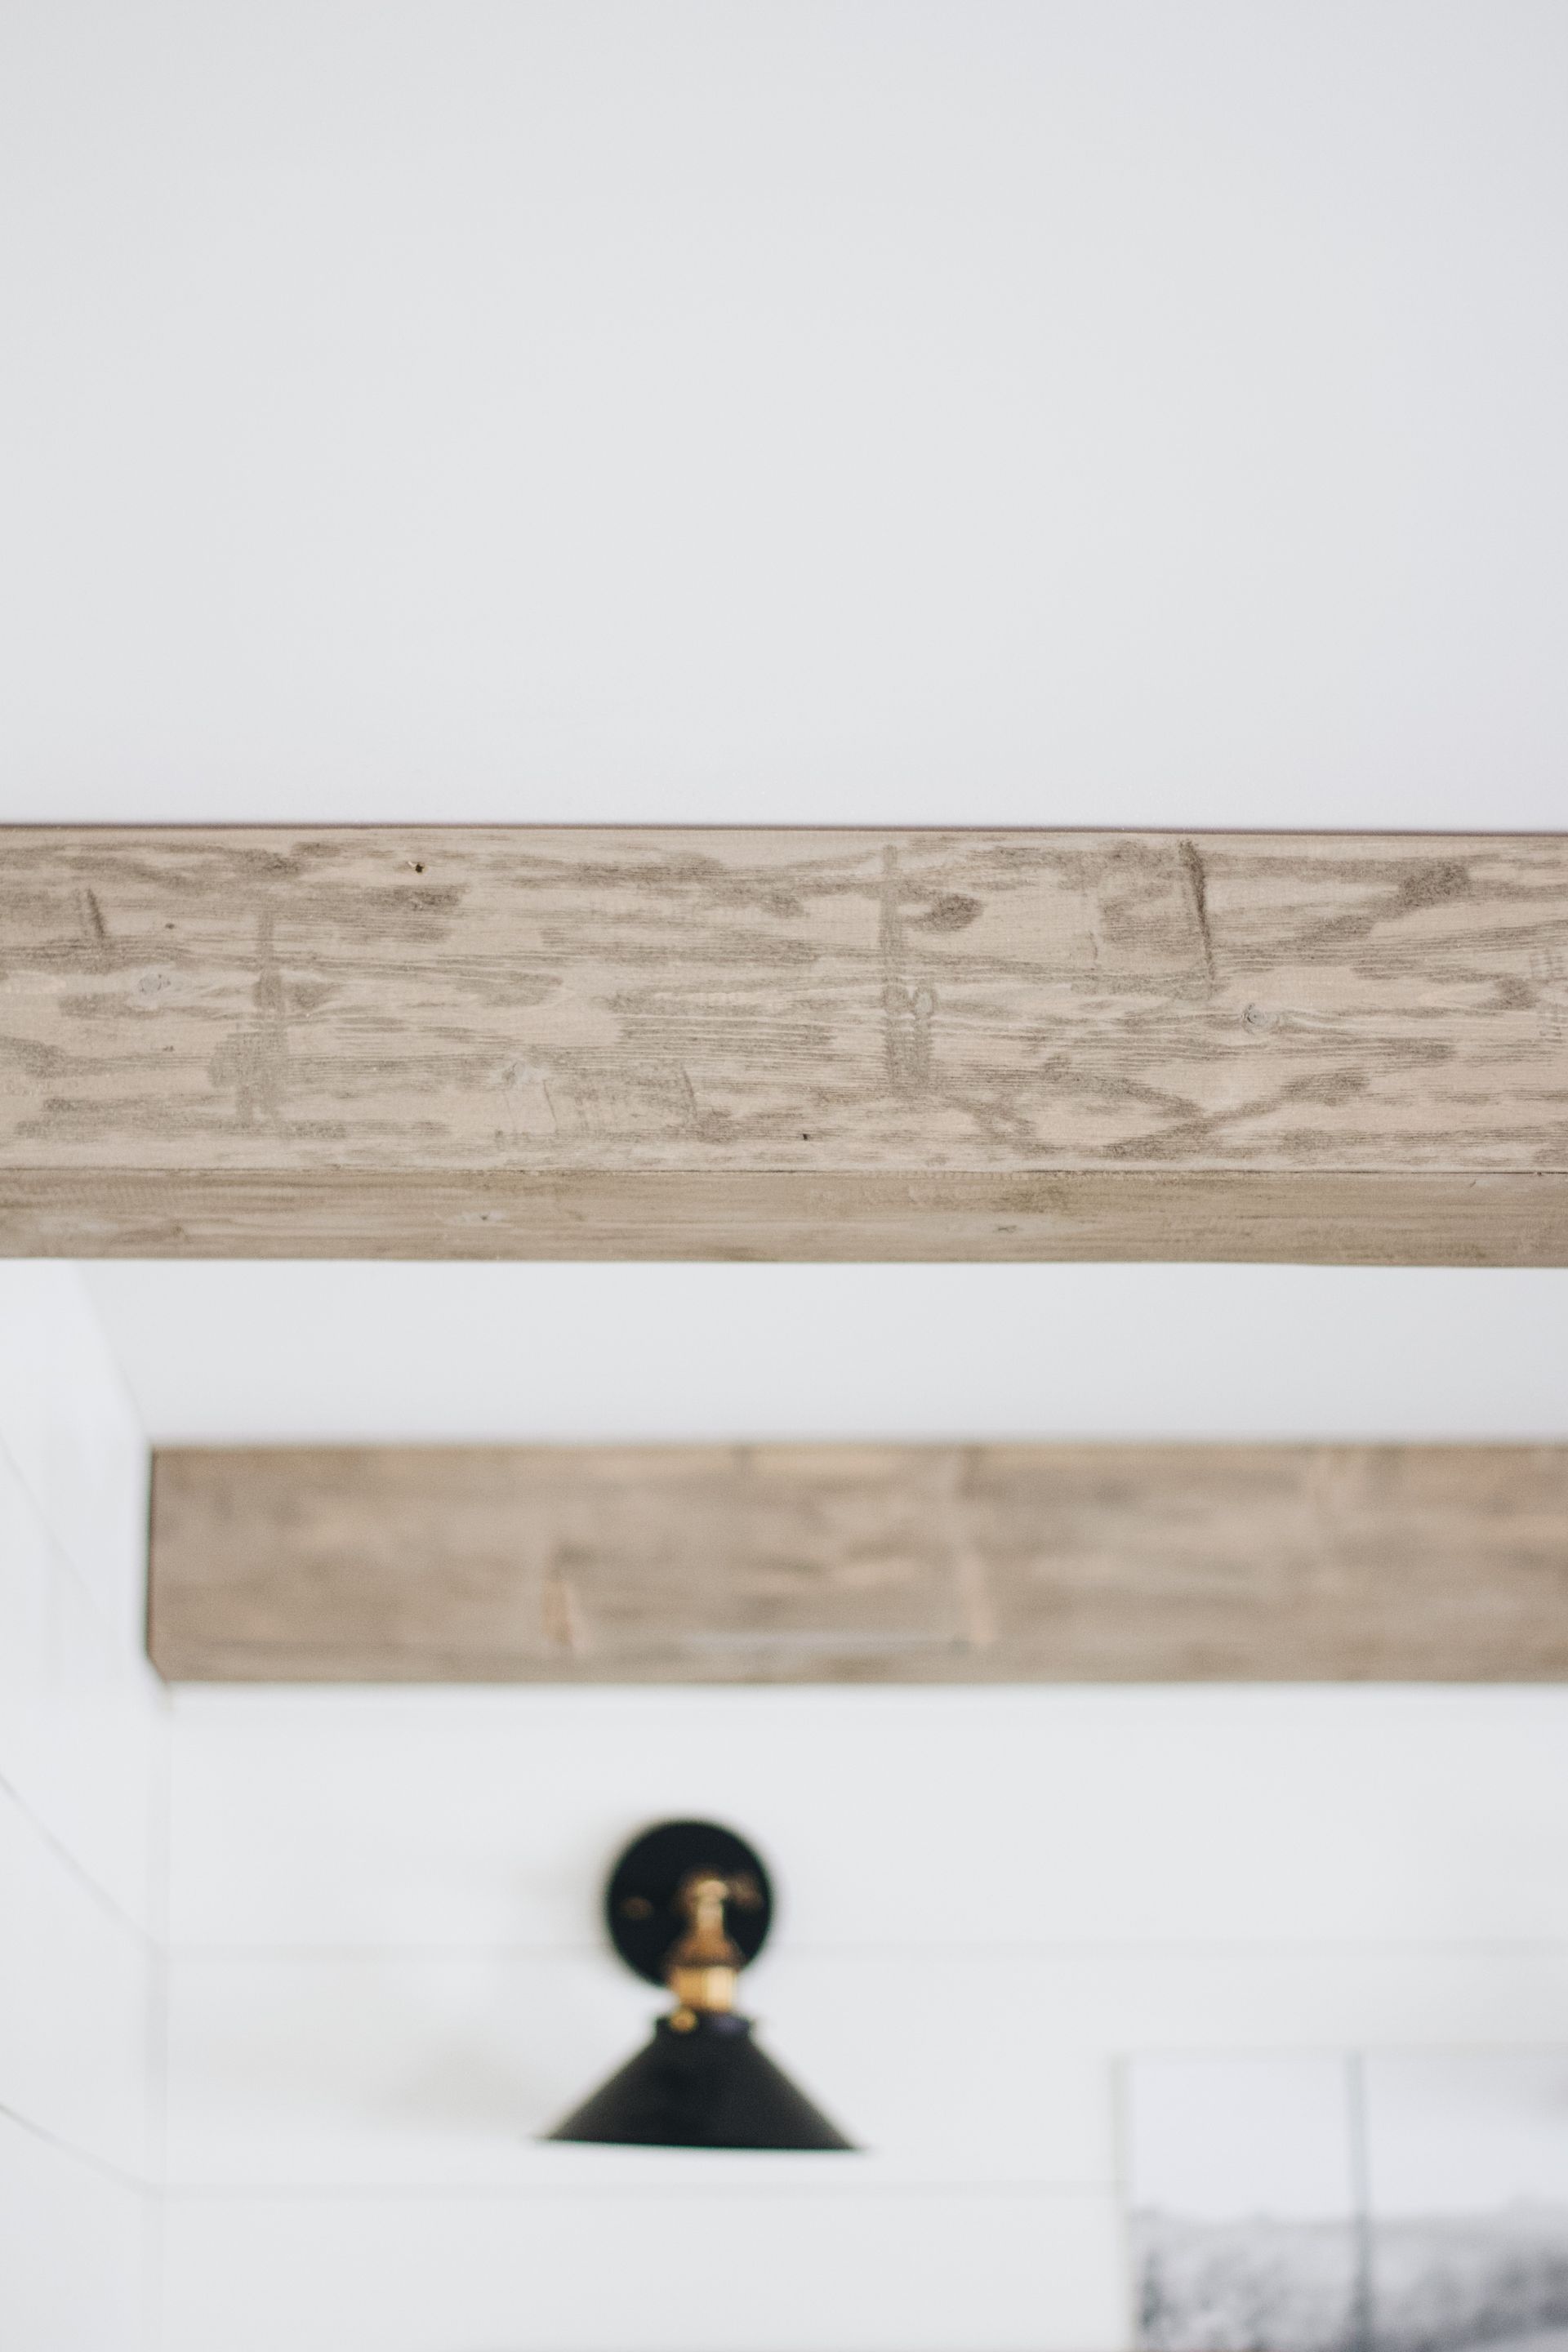
What I use to color the beams
1 part water - 1 part Revere Pewter Paint (I make a large batch)
Wood Finish Stain. Semi-Transparent Special Walnut
Wood Finish Stain. Semi-Transparent Dark Walnut
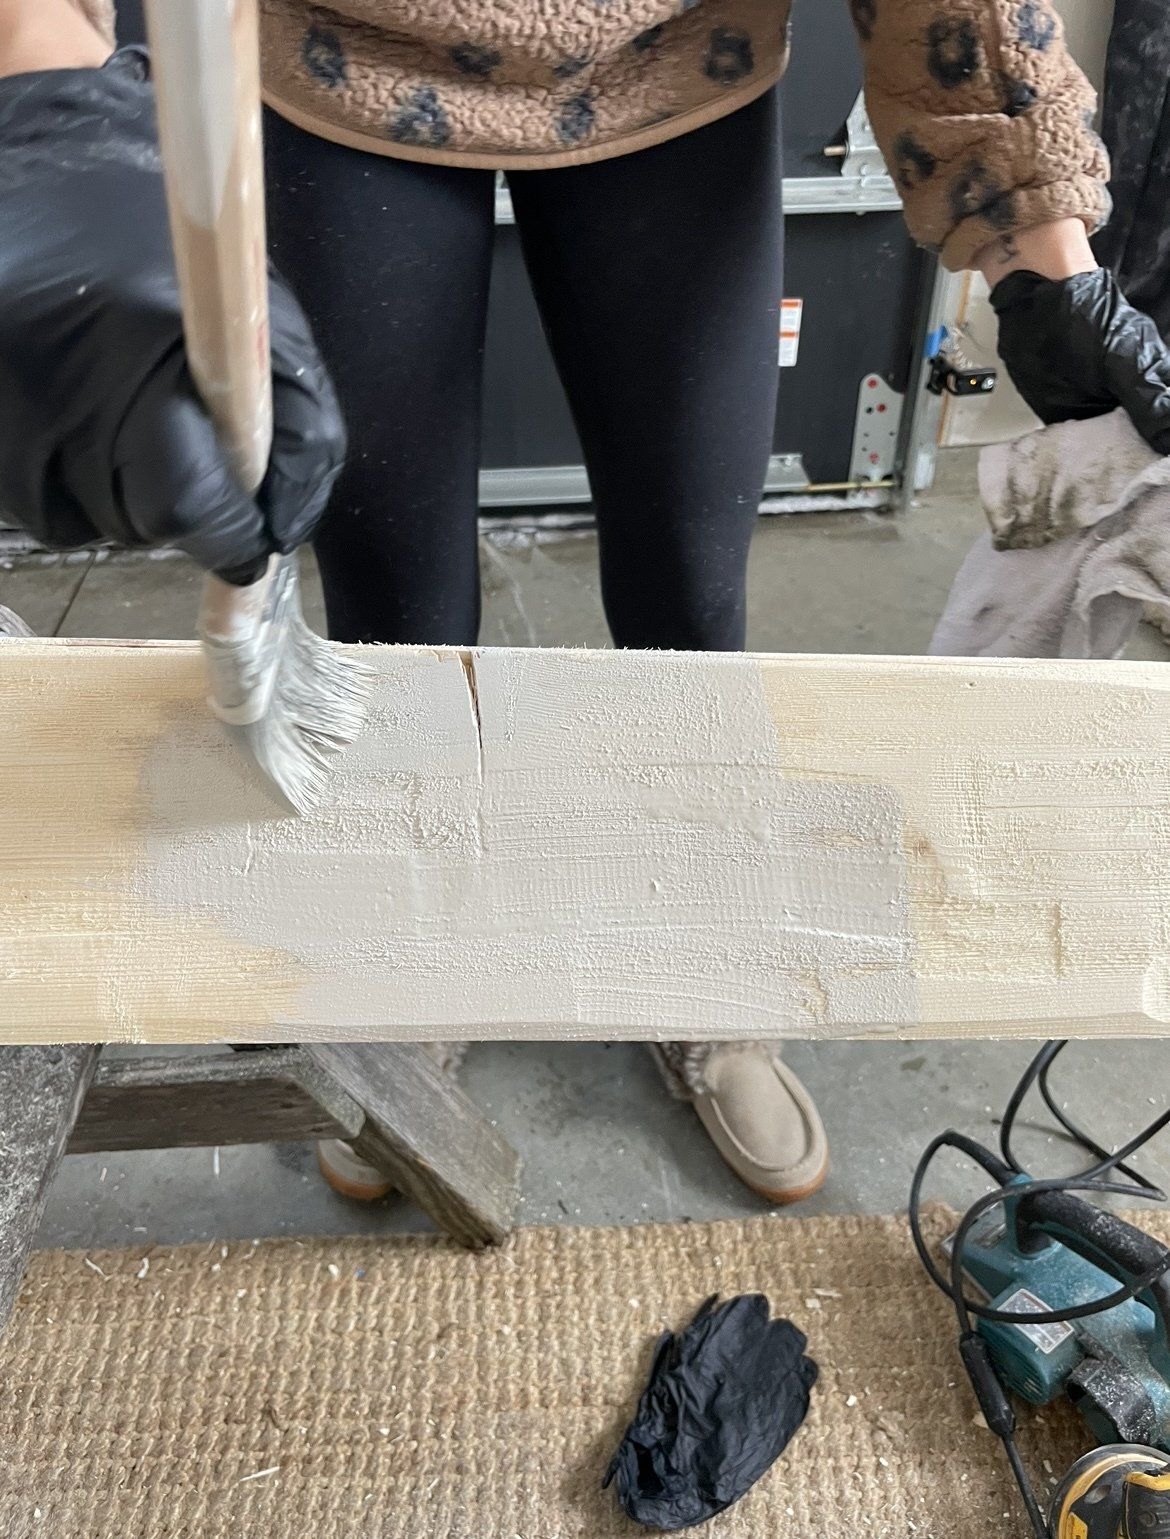
Water and Paint mixture is first. It goes on pretty watery and that's ok! Paint the entire parts you will see. Then go in and wipe it off with a towel. You want to wipe off as much as possible treating it like a stain. I don't wait for this to dry before moving onto the next step. You can do all of these steps one right after the other.
Special Walnut is next. I use the same technique as the paint for the stain. Sponge it on. Wipe off. I love using staining pads for this. They are right next to the stain in any home improvement store and make the process so much quicker and stretch the stain so much further.
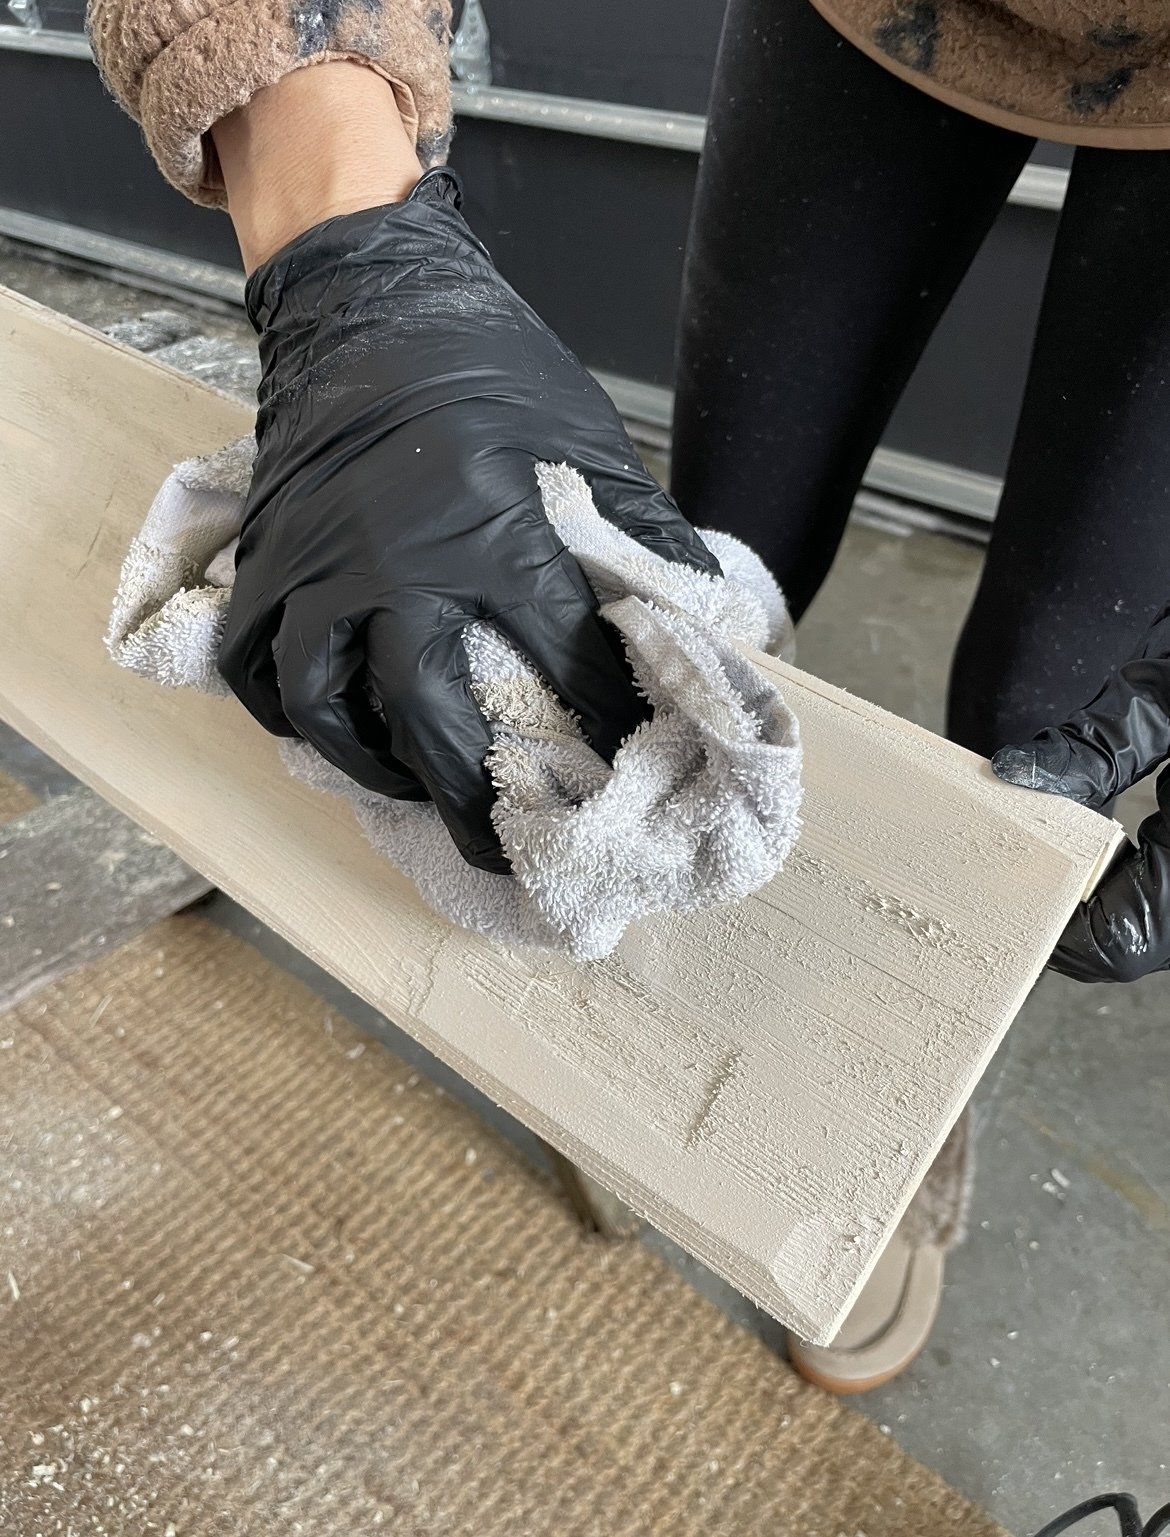
Step 7
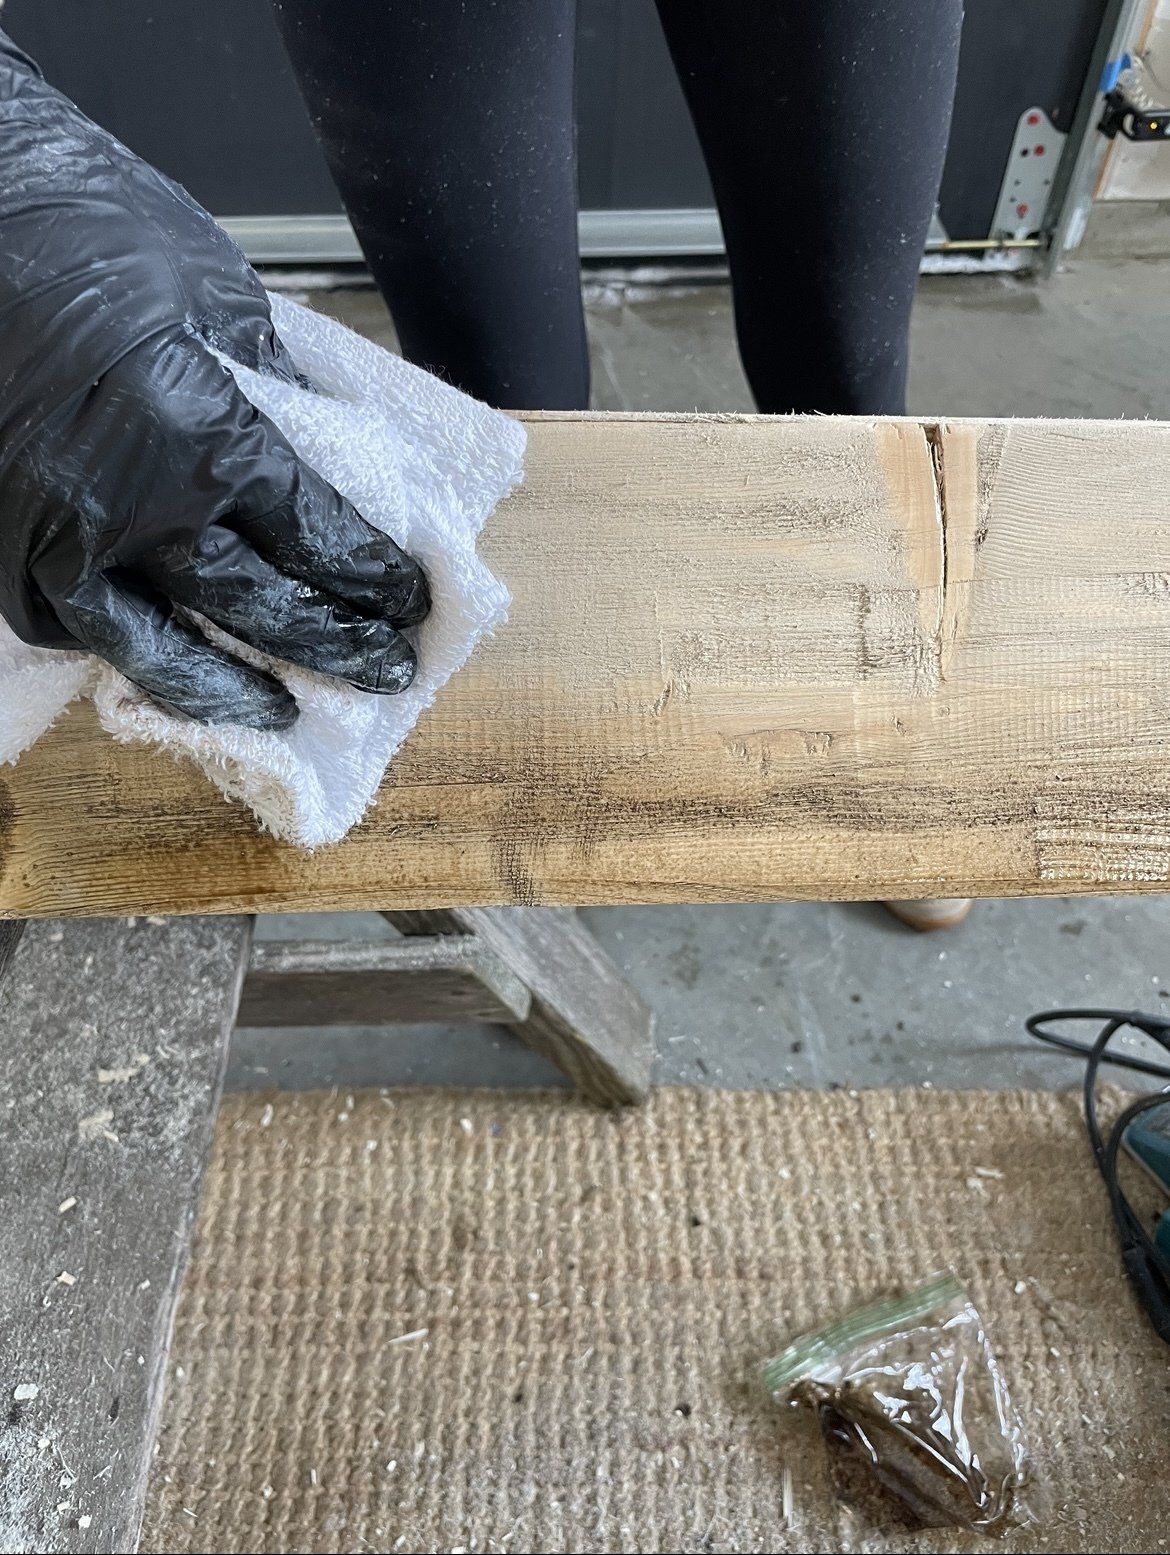
Step 8
I finish with the Dark Walnut. It always looks like it is going to be SO MUCH darker. Don't panic! When you wipe it off it comes out to the most beautiful color!


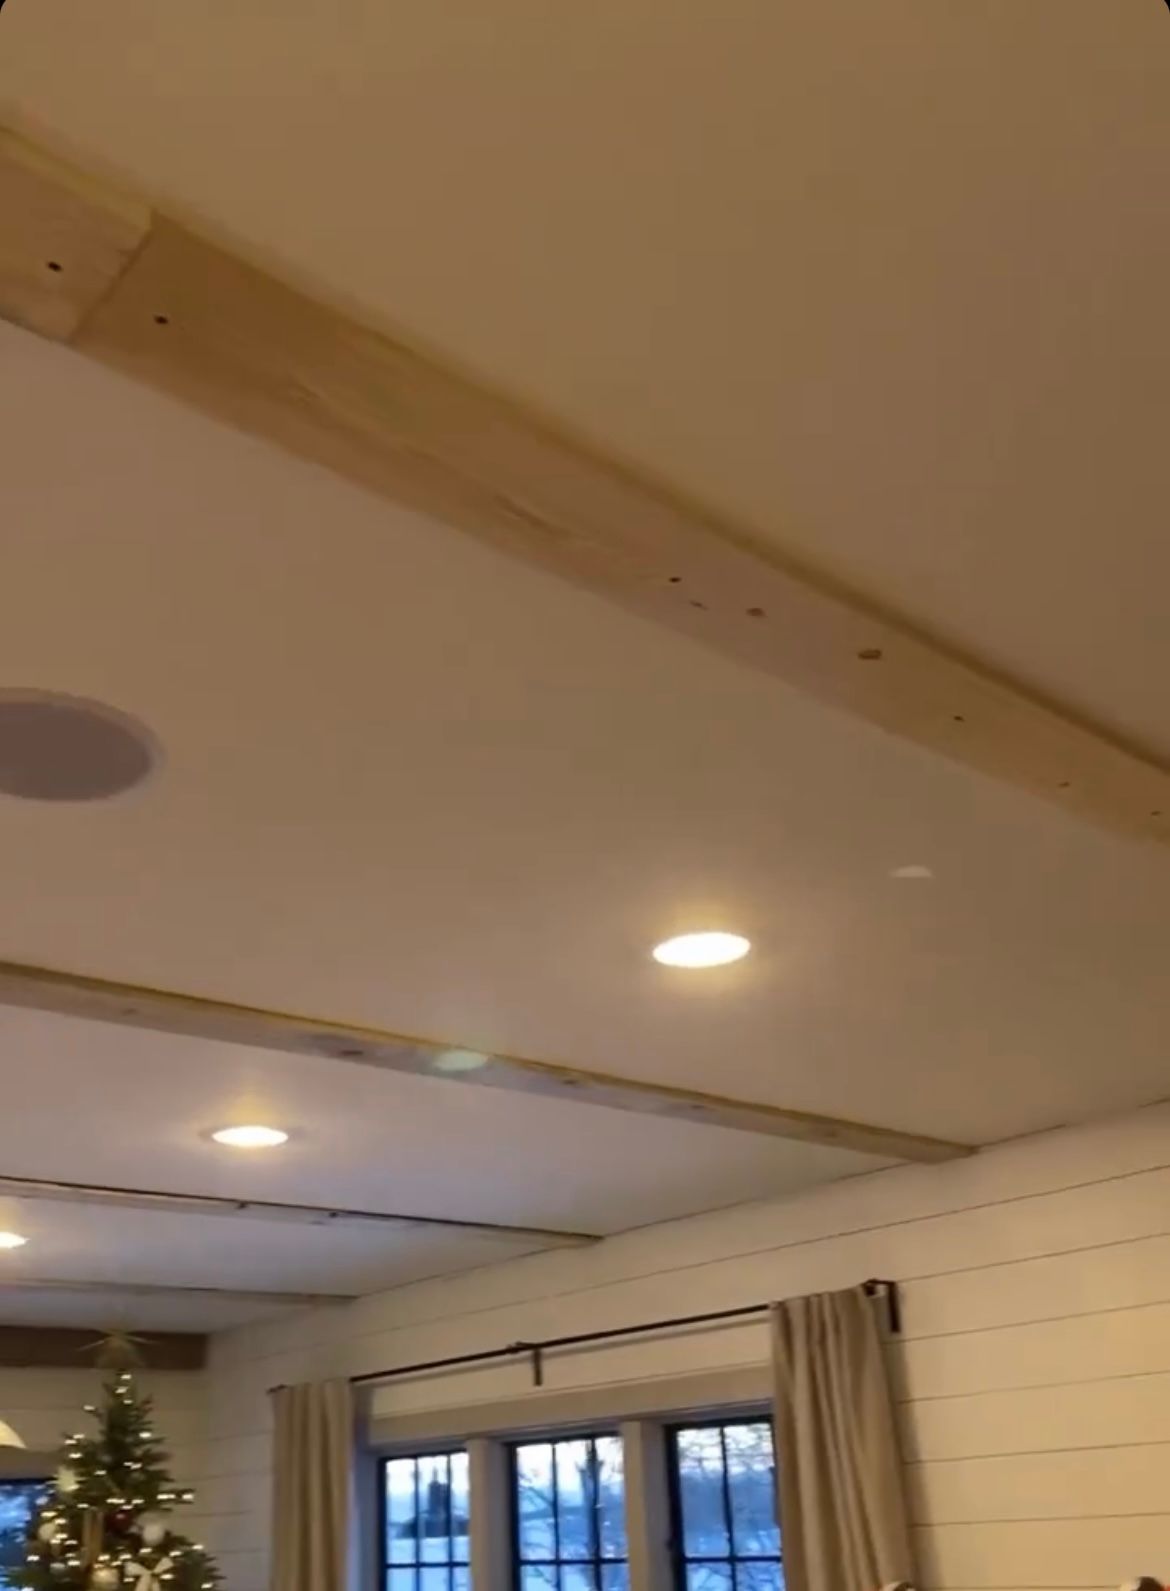
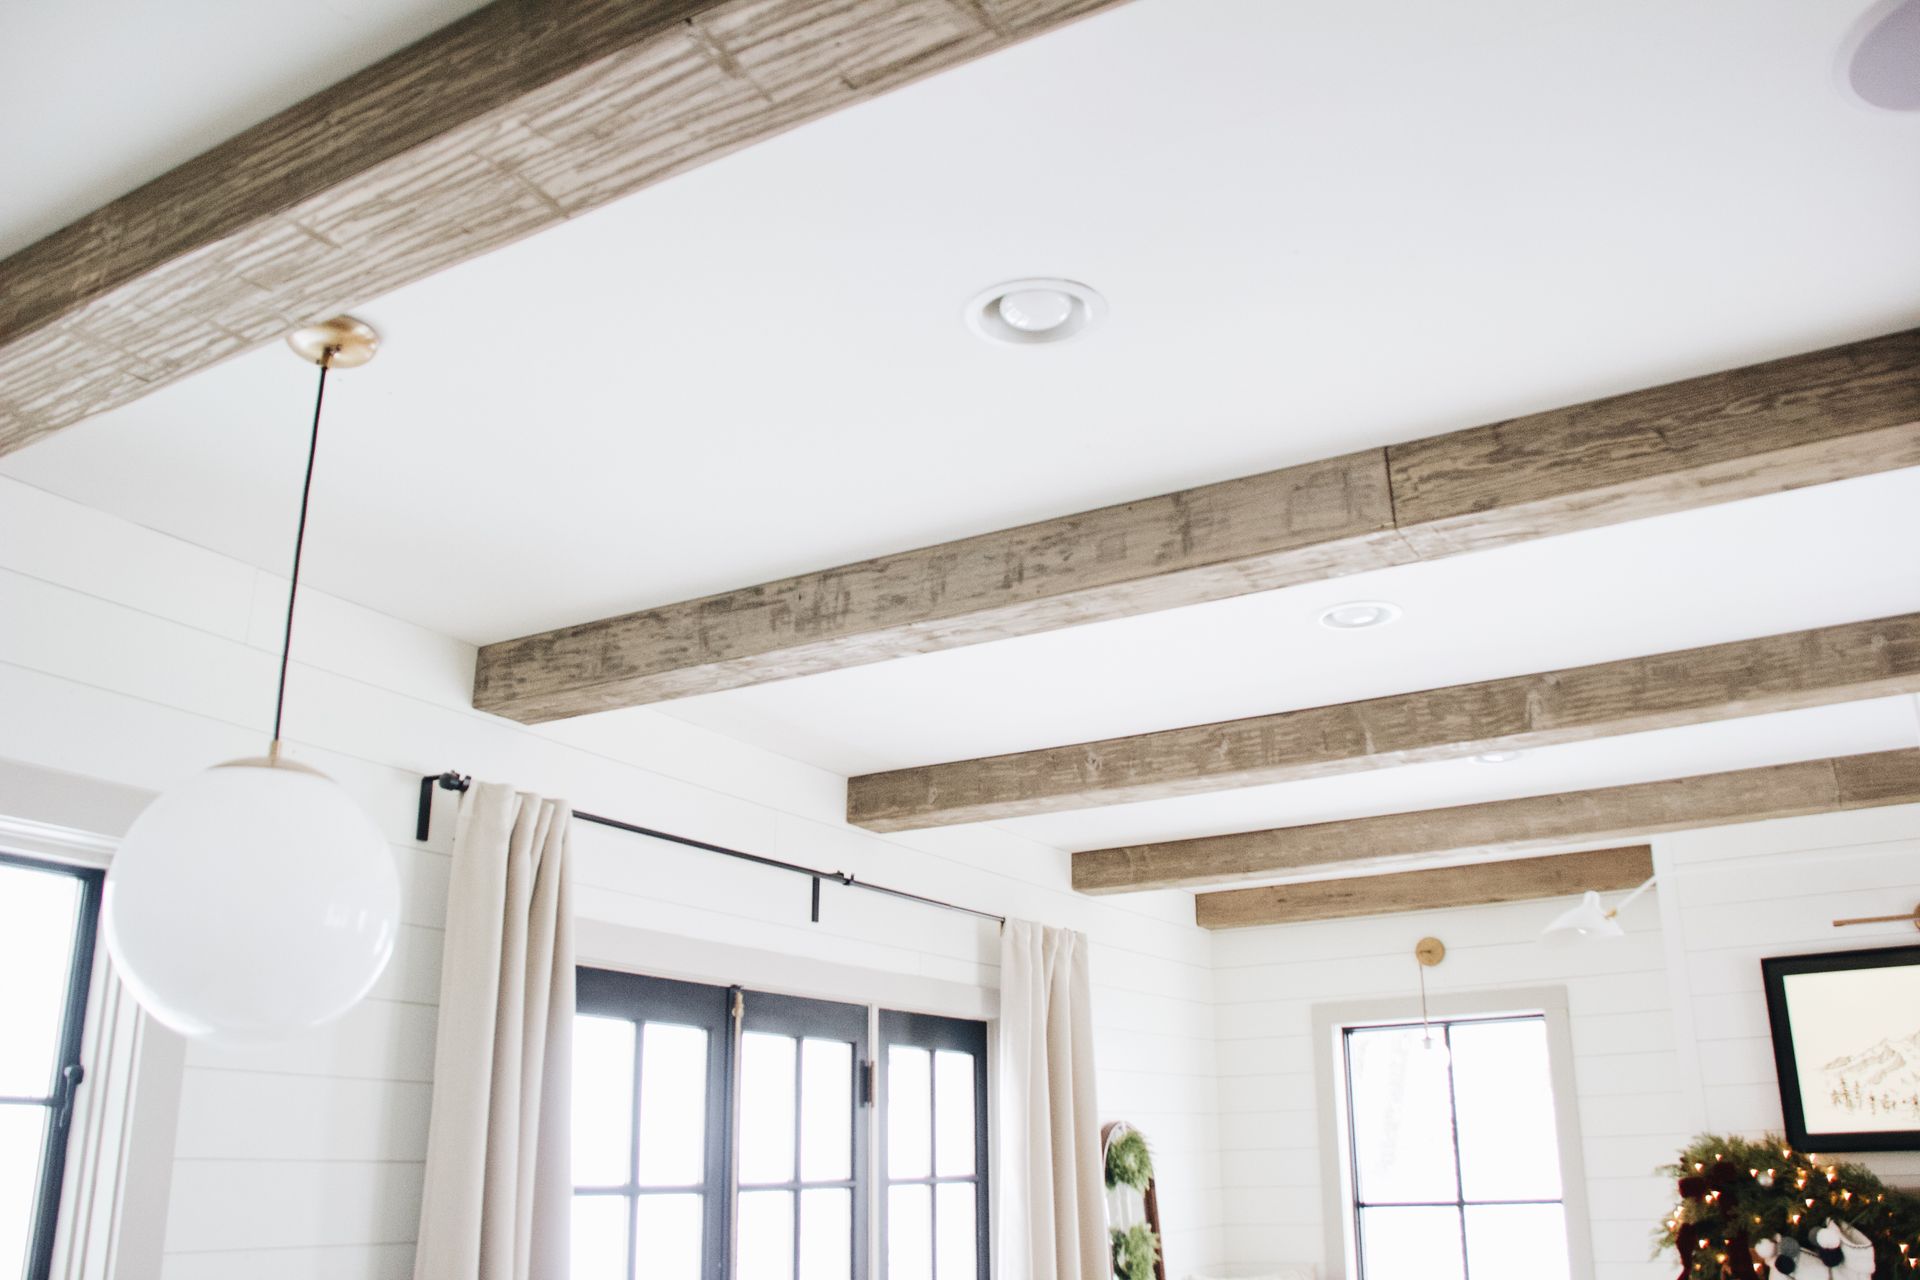
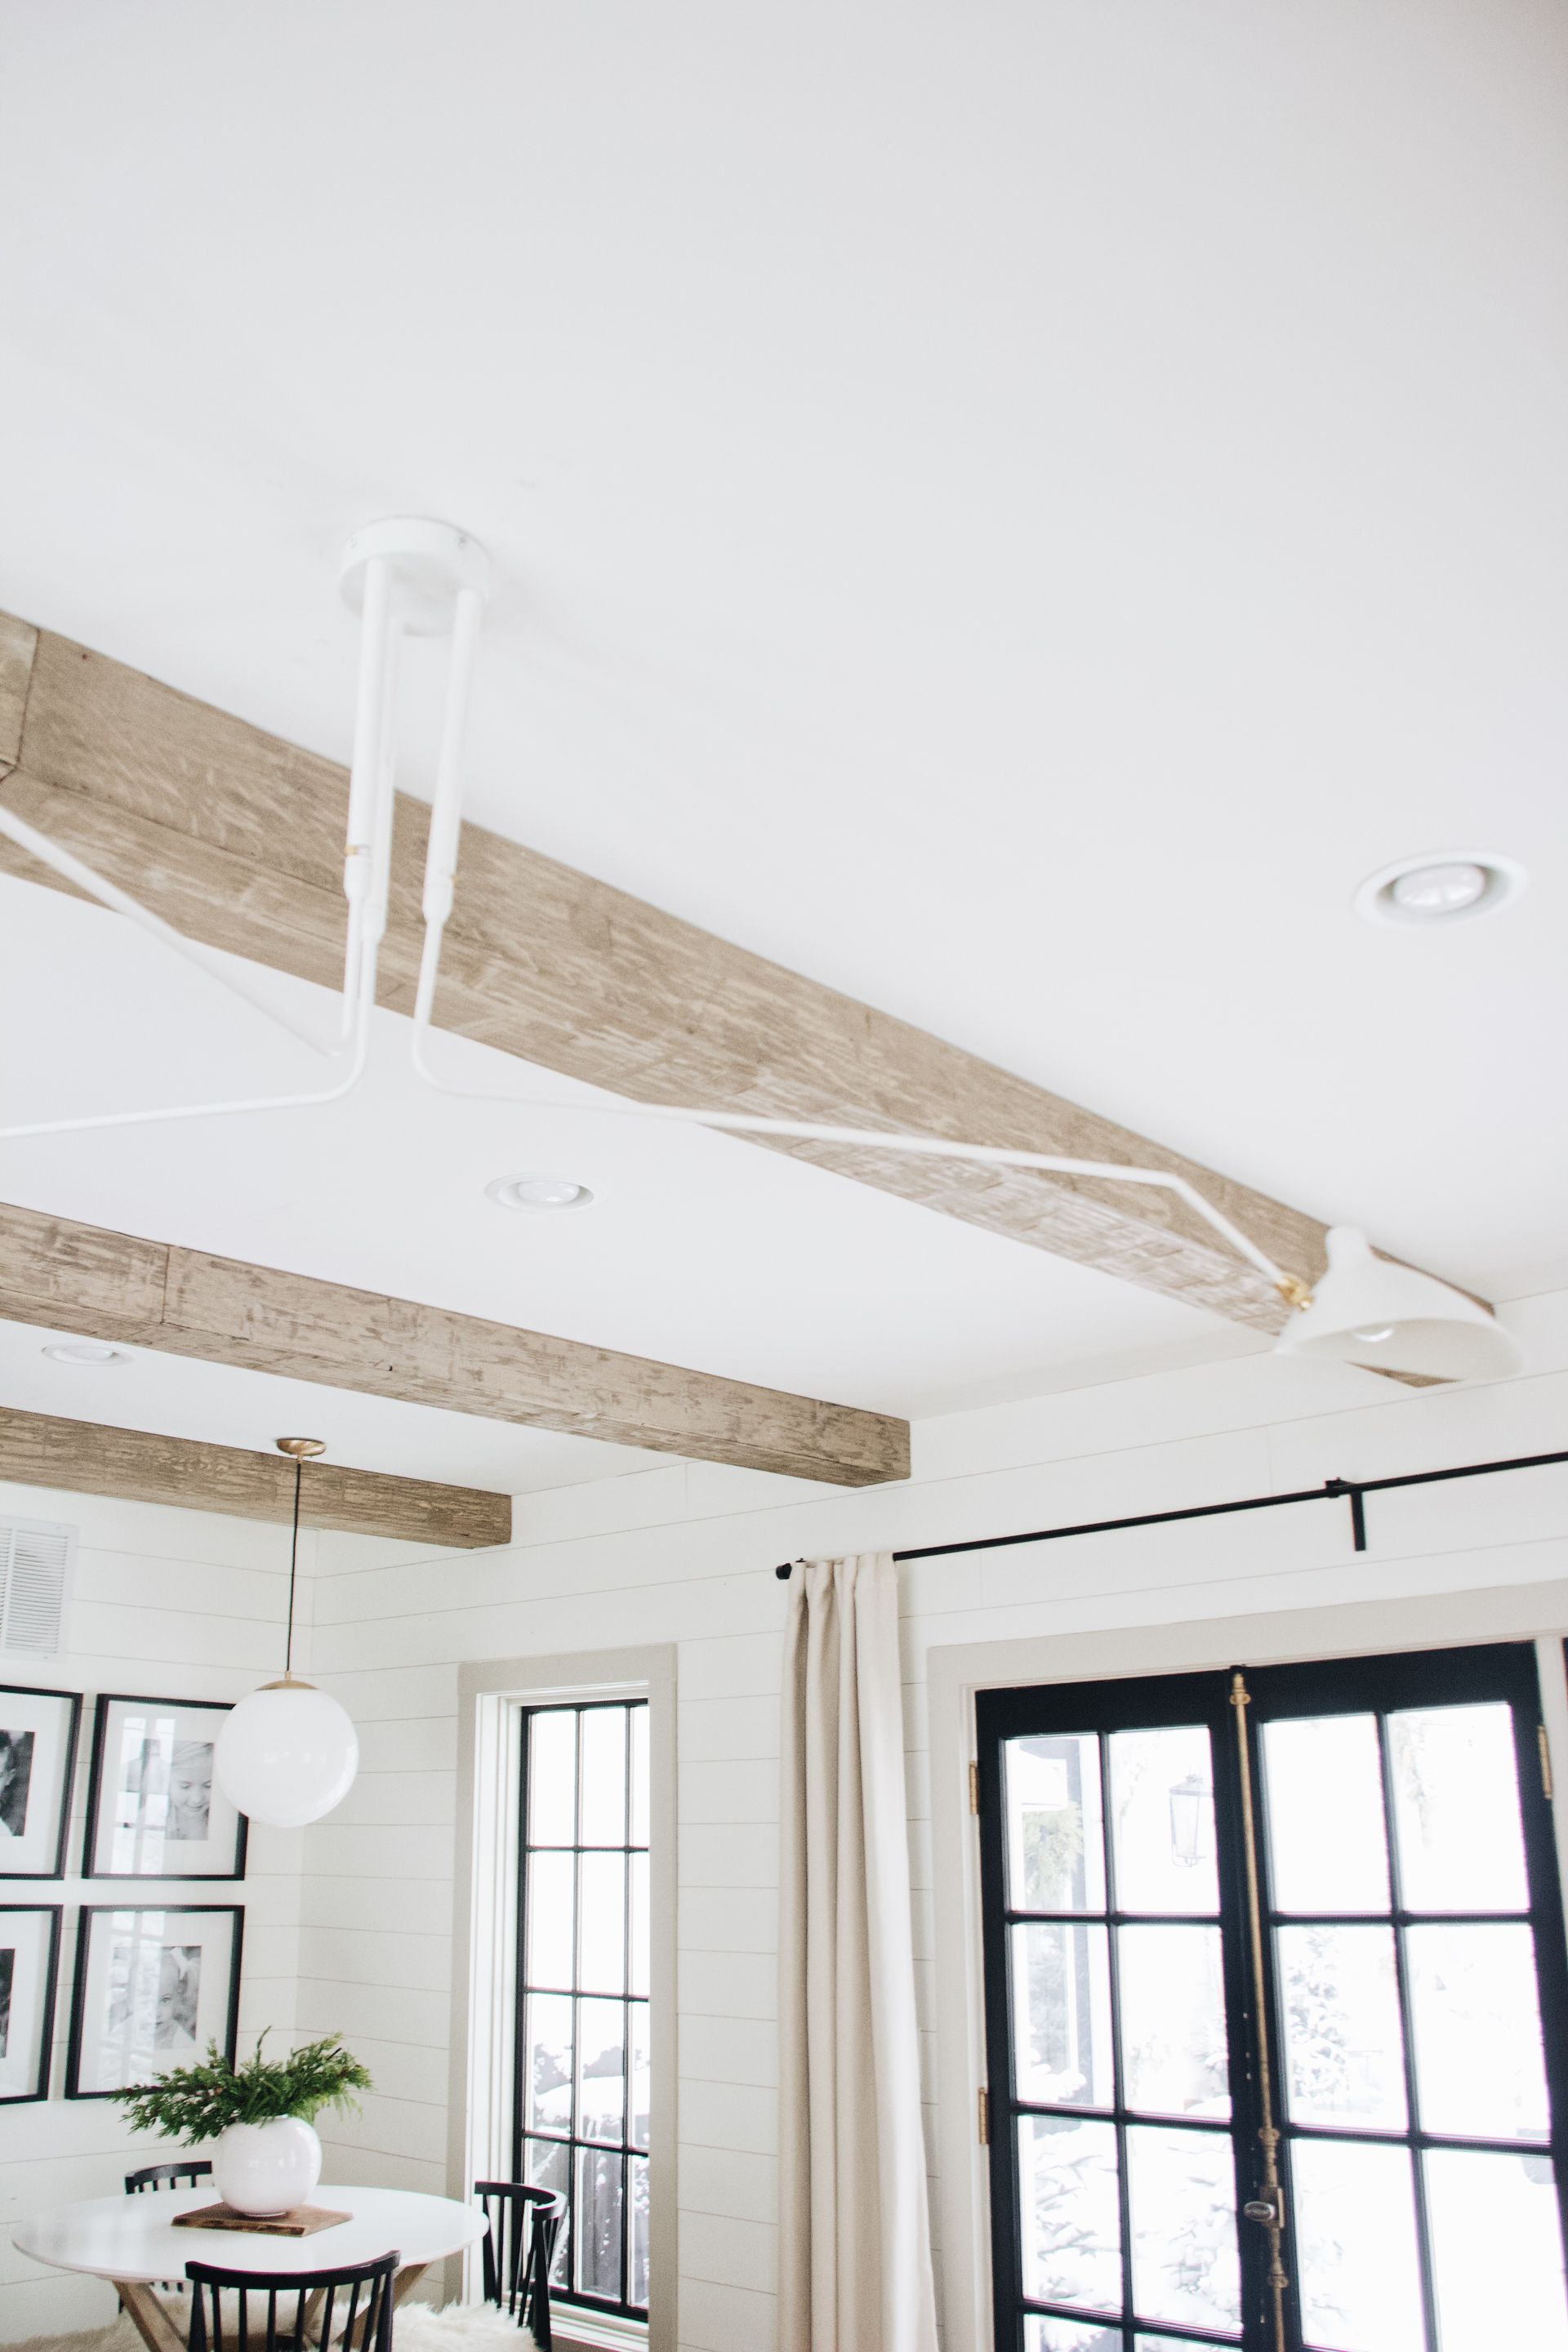
We used a laser level to help make sure the beams are level. Then Ryan attached 1x6 pine boards to the studs in the ceiling. What you don't see in the picture is Ryan actually added a few 2x4 chunks coming down off the 1x6 so he had a way to attach the beam from underneath as well. Ryan always put a small piece of blue tape where those 2x4/s were so when setting and drilling the beams in they are mounted to a stud! Very important!
We ended up just doing a couple of them at a time as the hoilidays were smack dab in the middle of this project! But we found a groove eventually and away we went in doing steps 1-8!
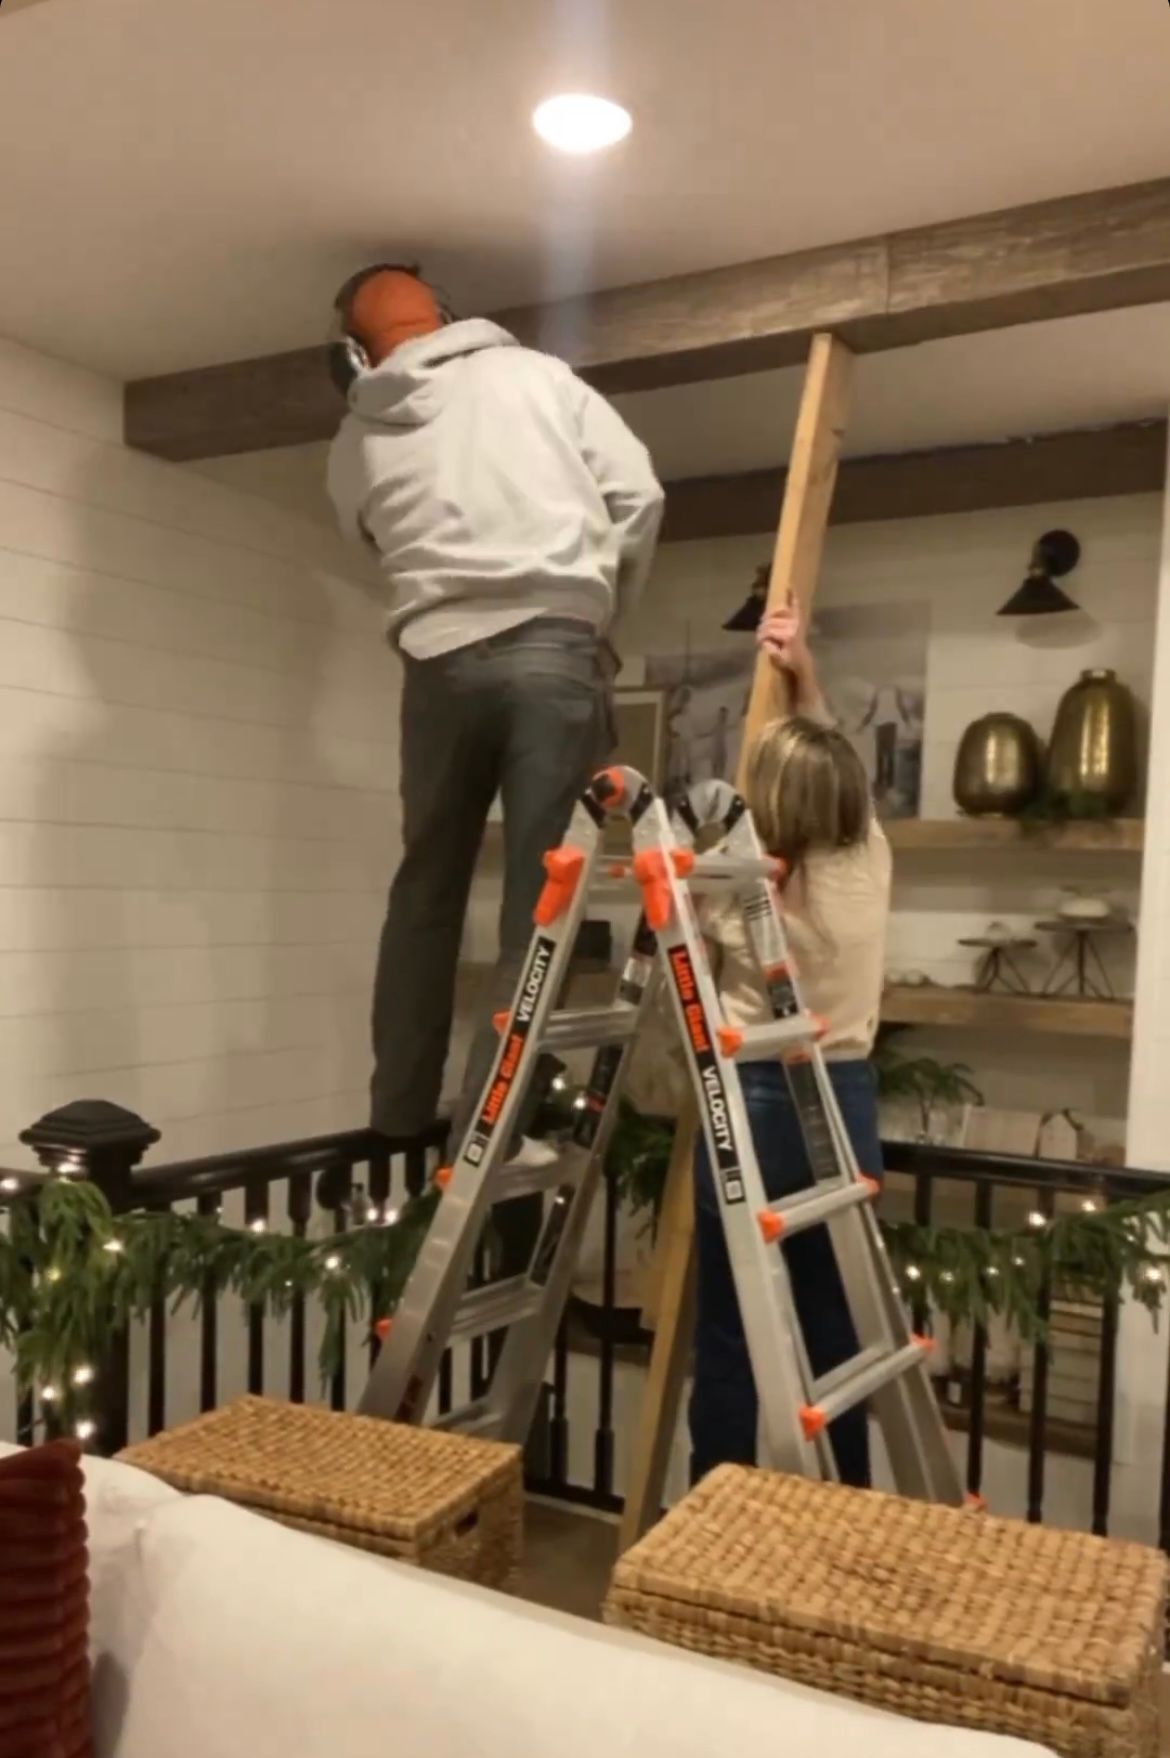
A brilliant trick Ryan came up with while we were installing them, was to have a board long enough to go under the beam as a kick stand kind of so it wasn't so heavy for us while getting it into place. It also helped to push the beam tight to the ceiling to create less of a gap. Total lifesaver!
You can see in the photo below what I am talking about.
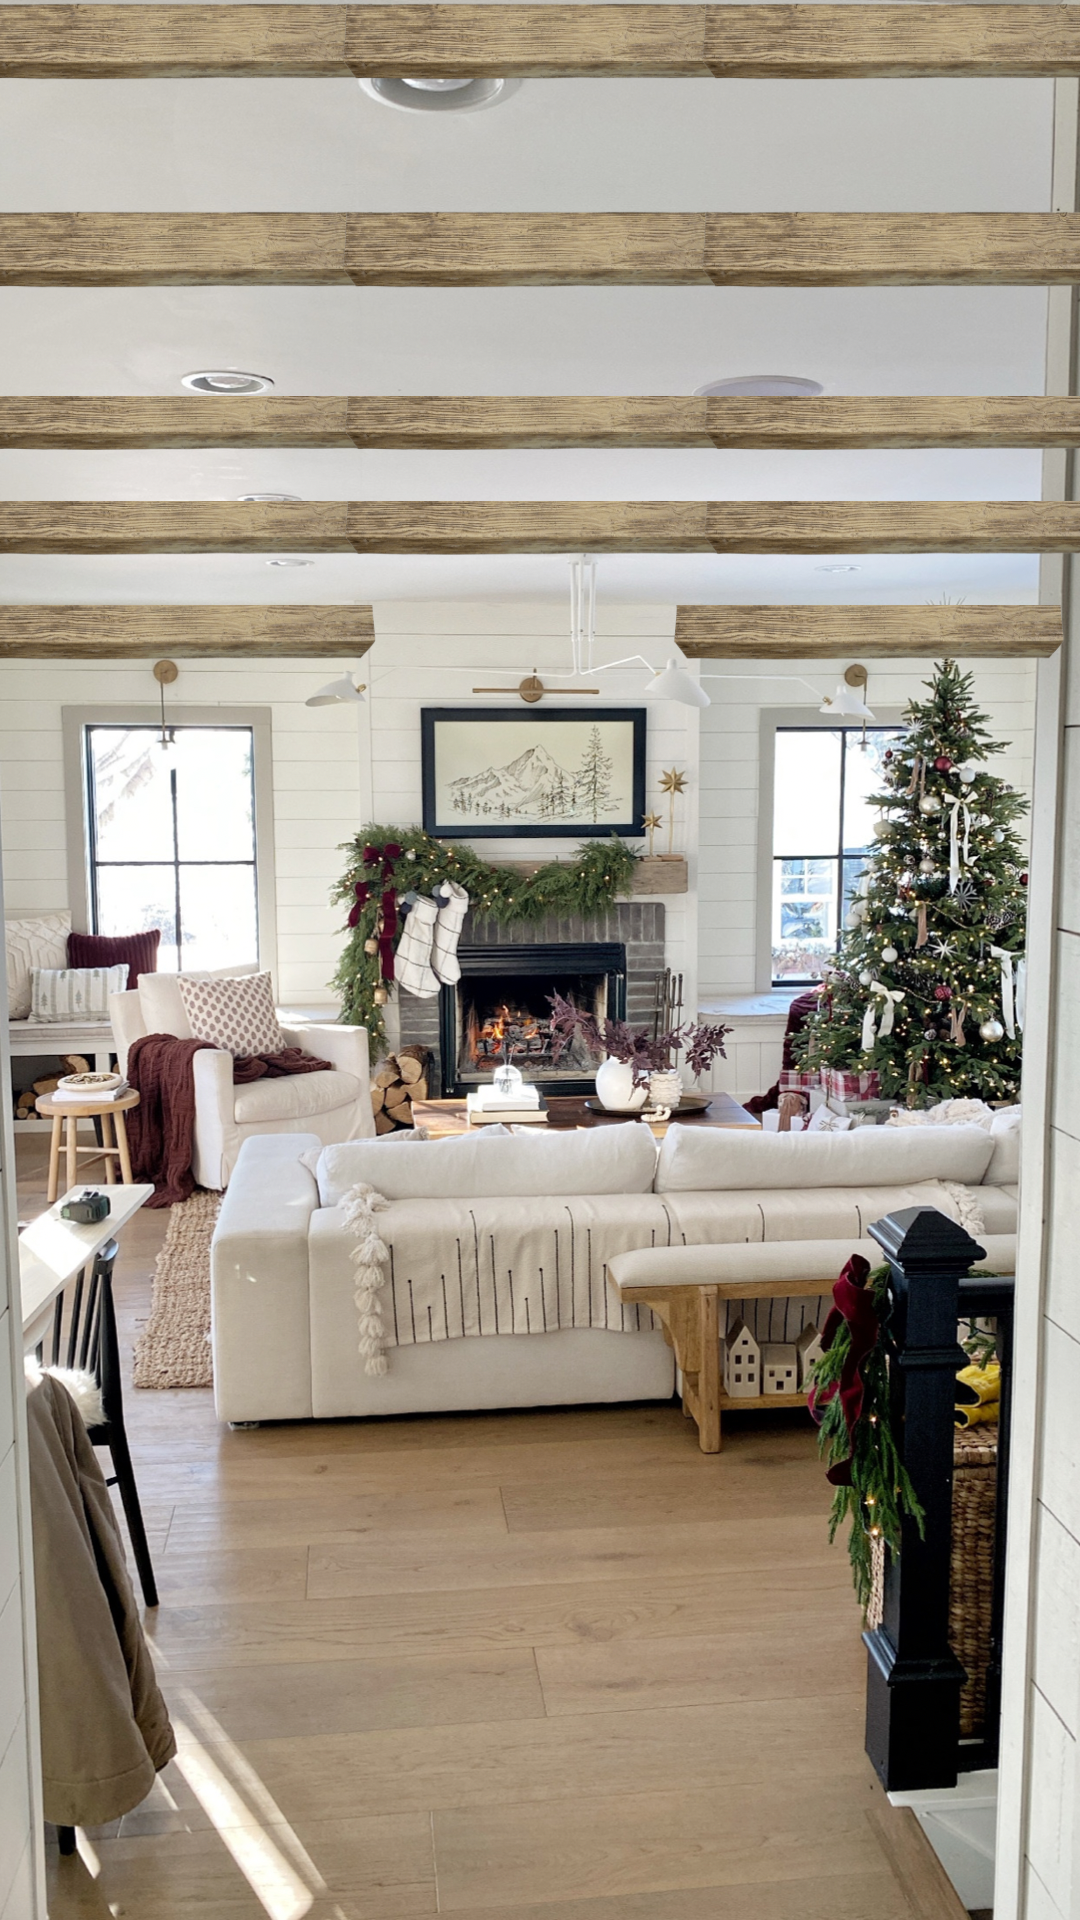
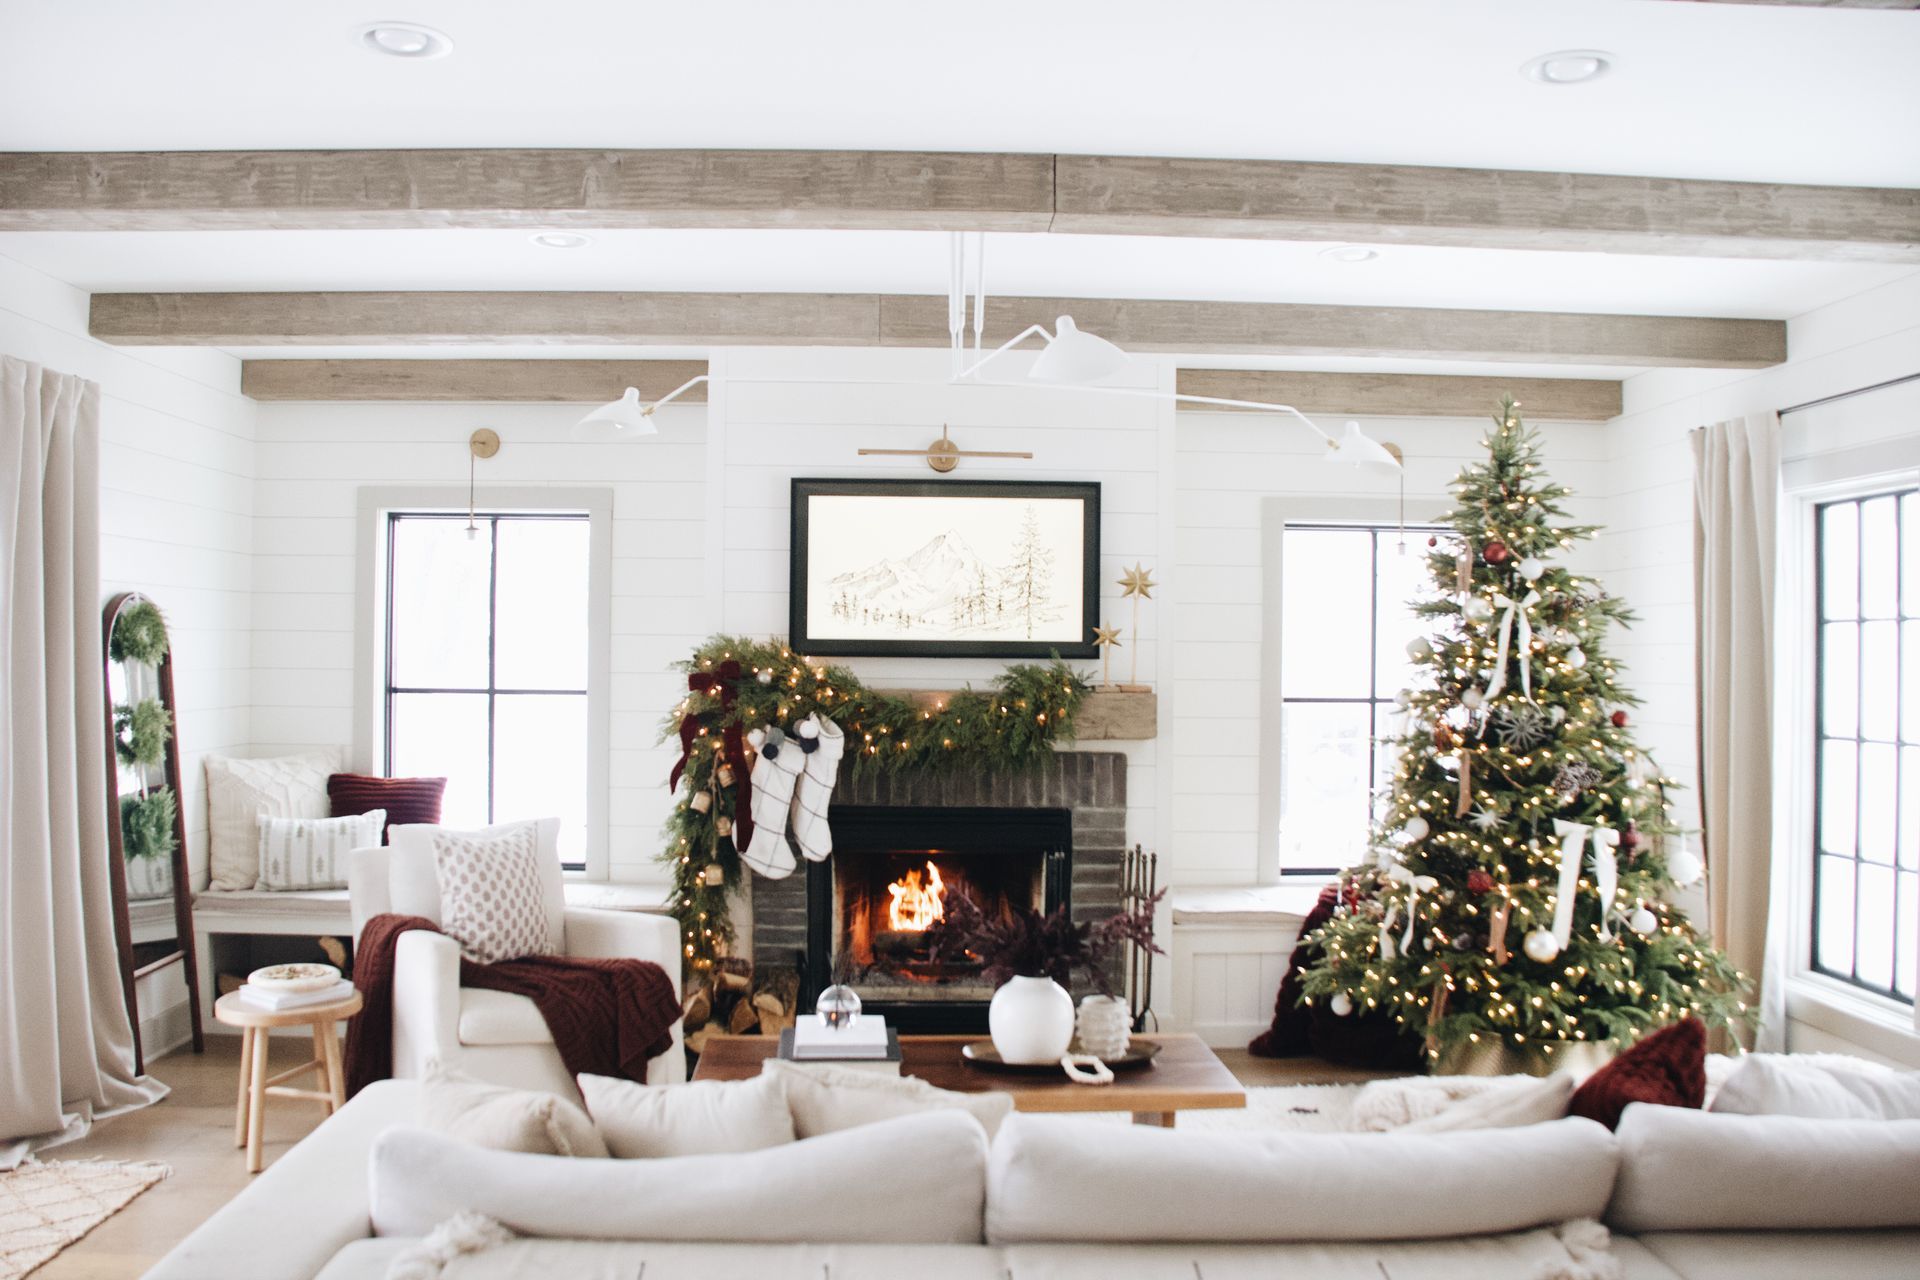
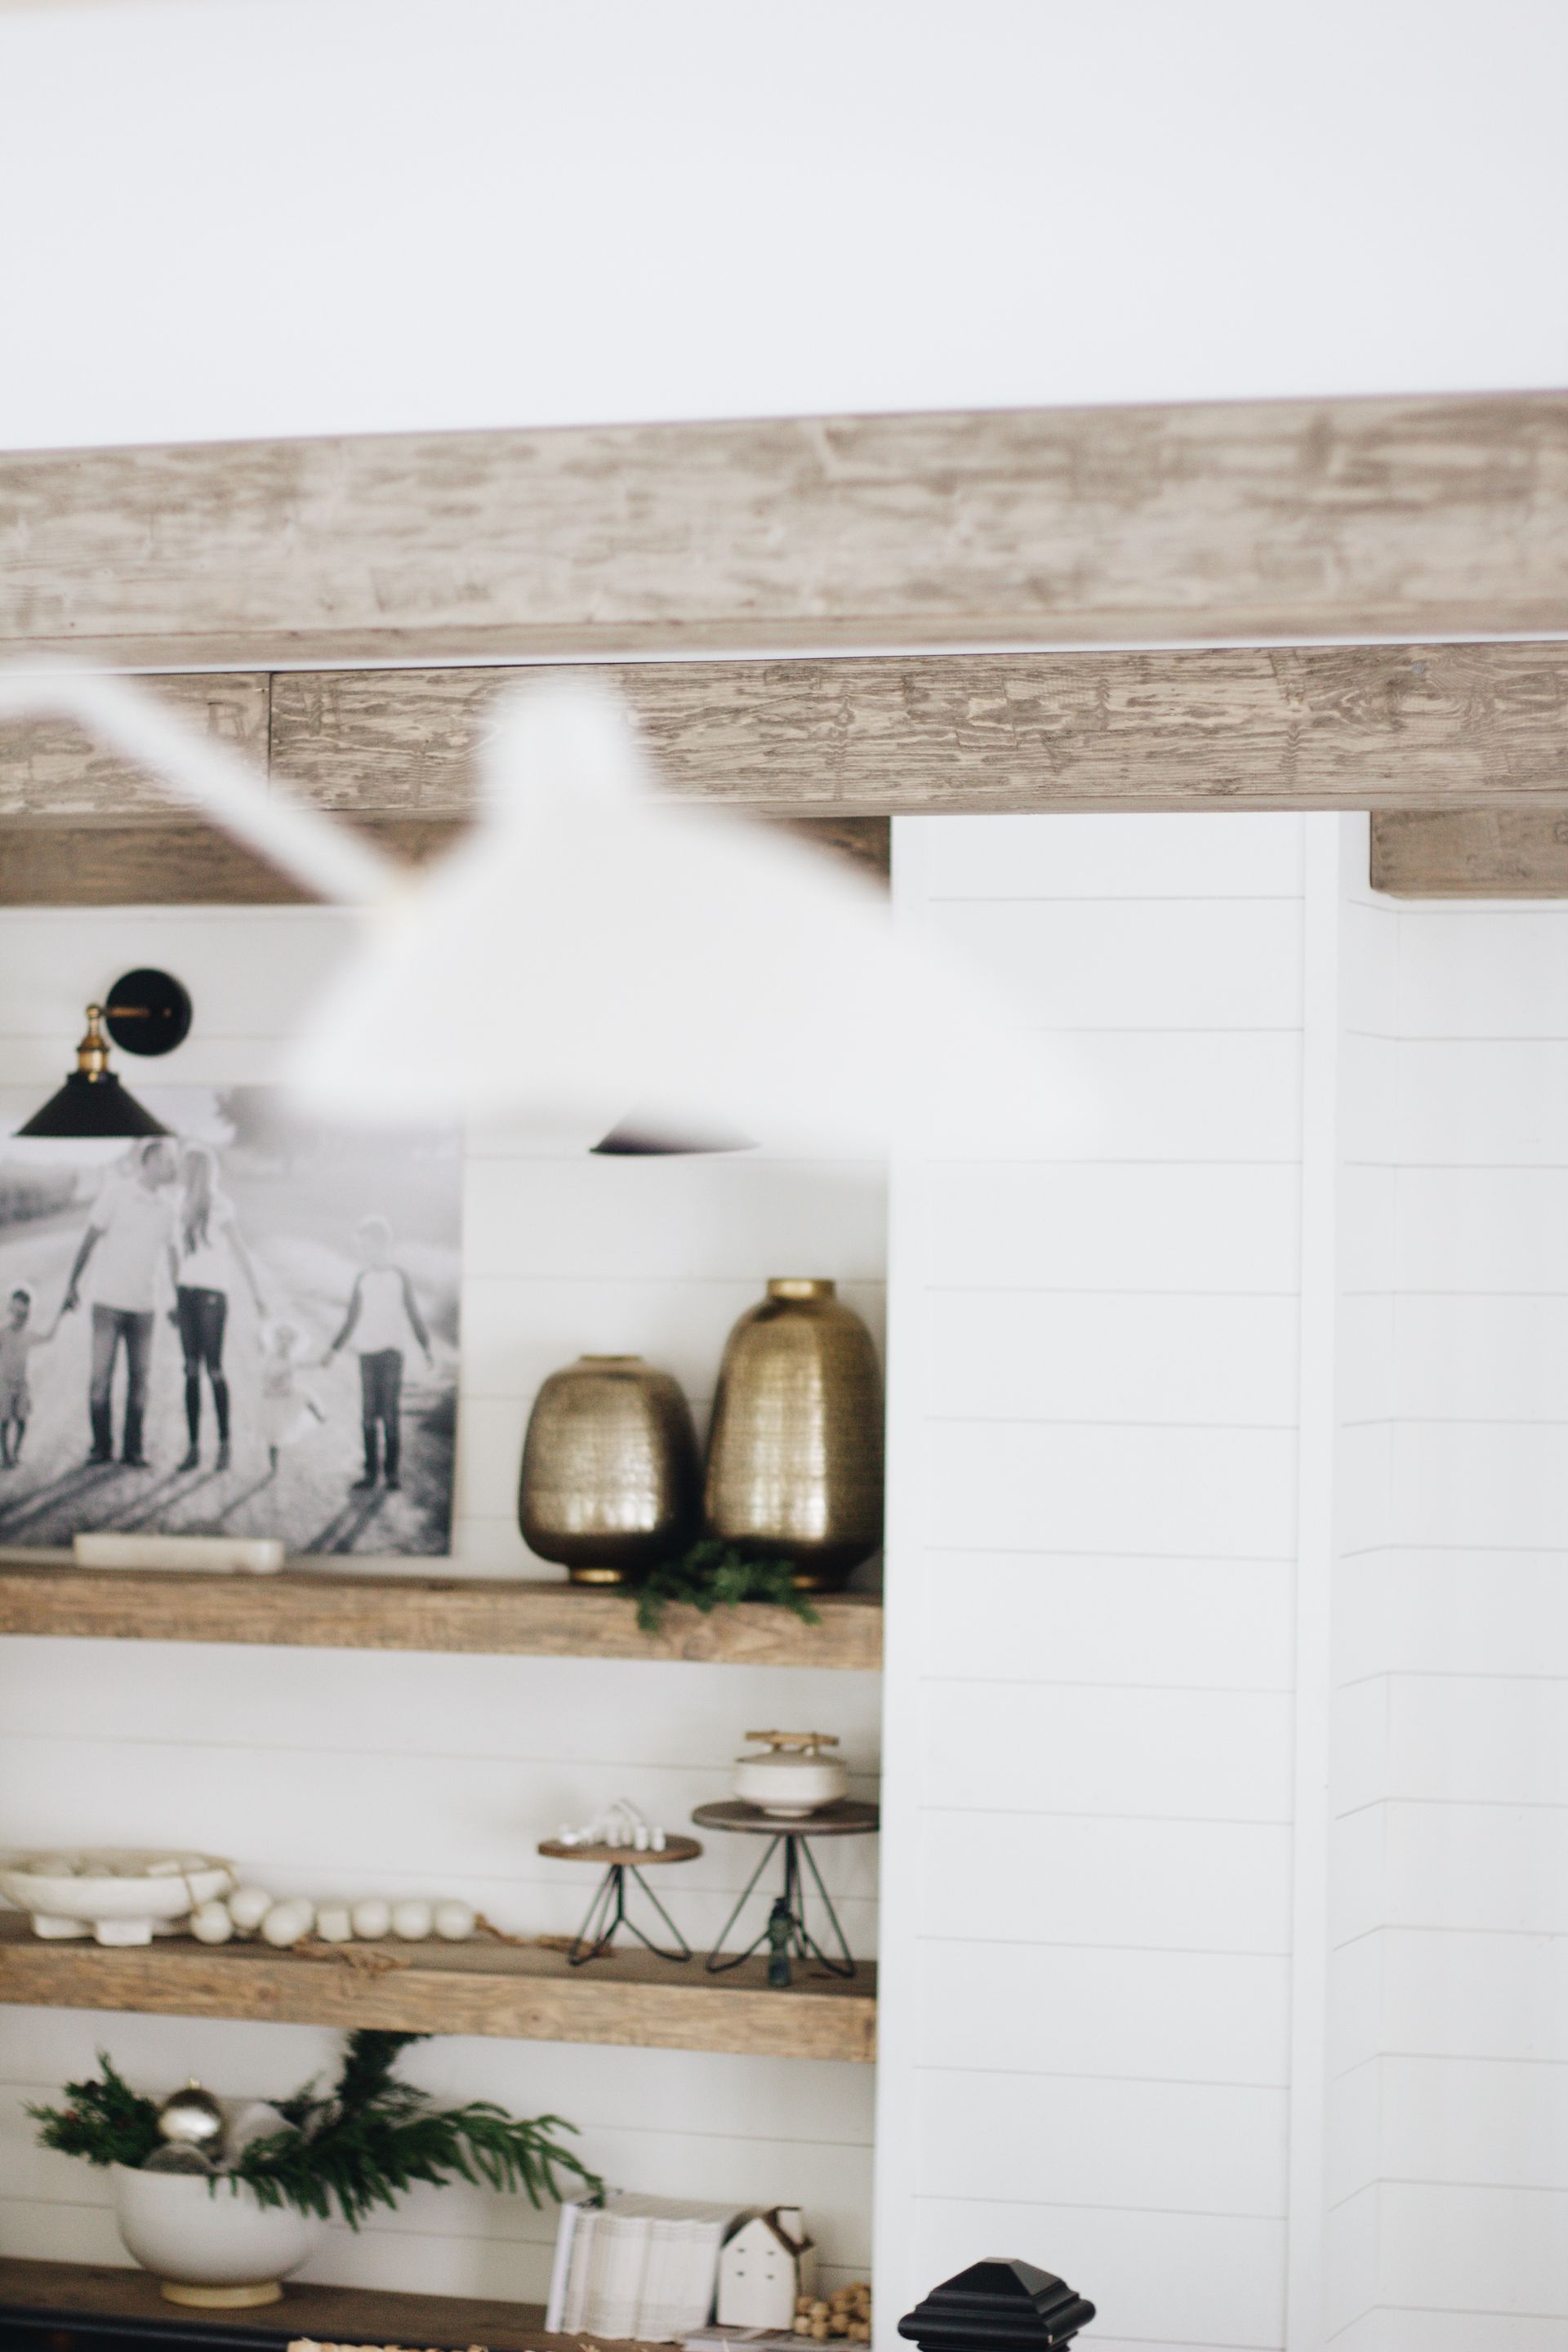
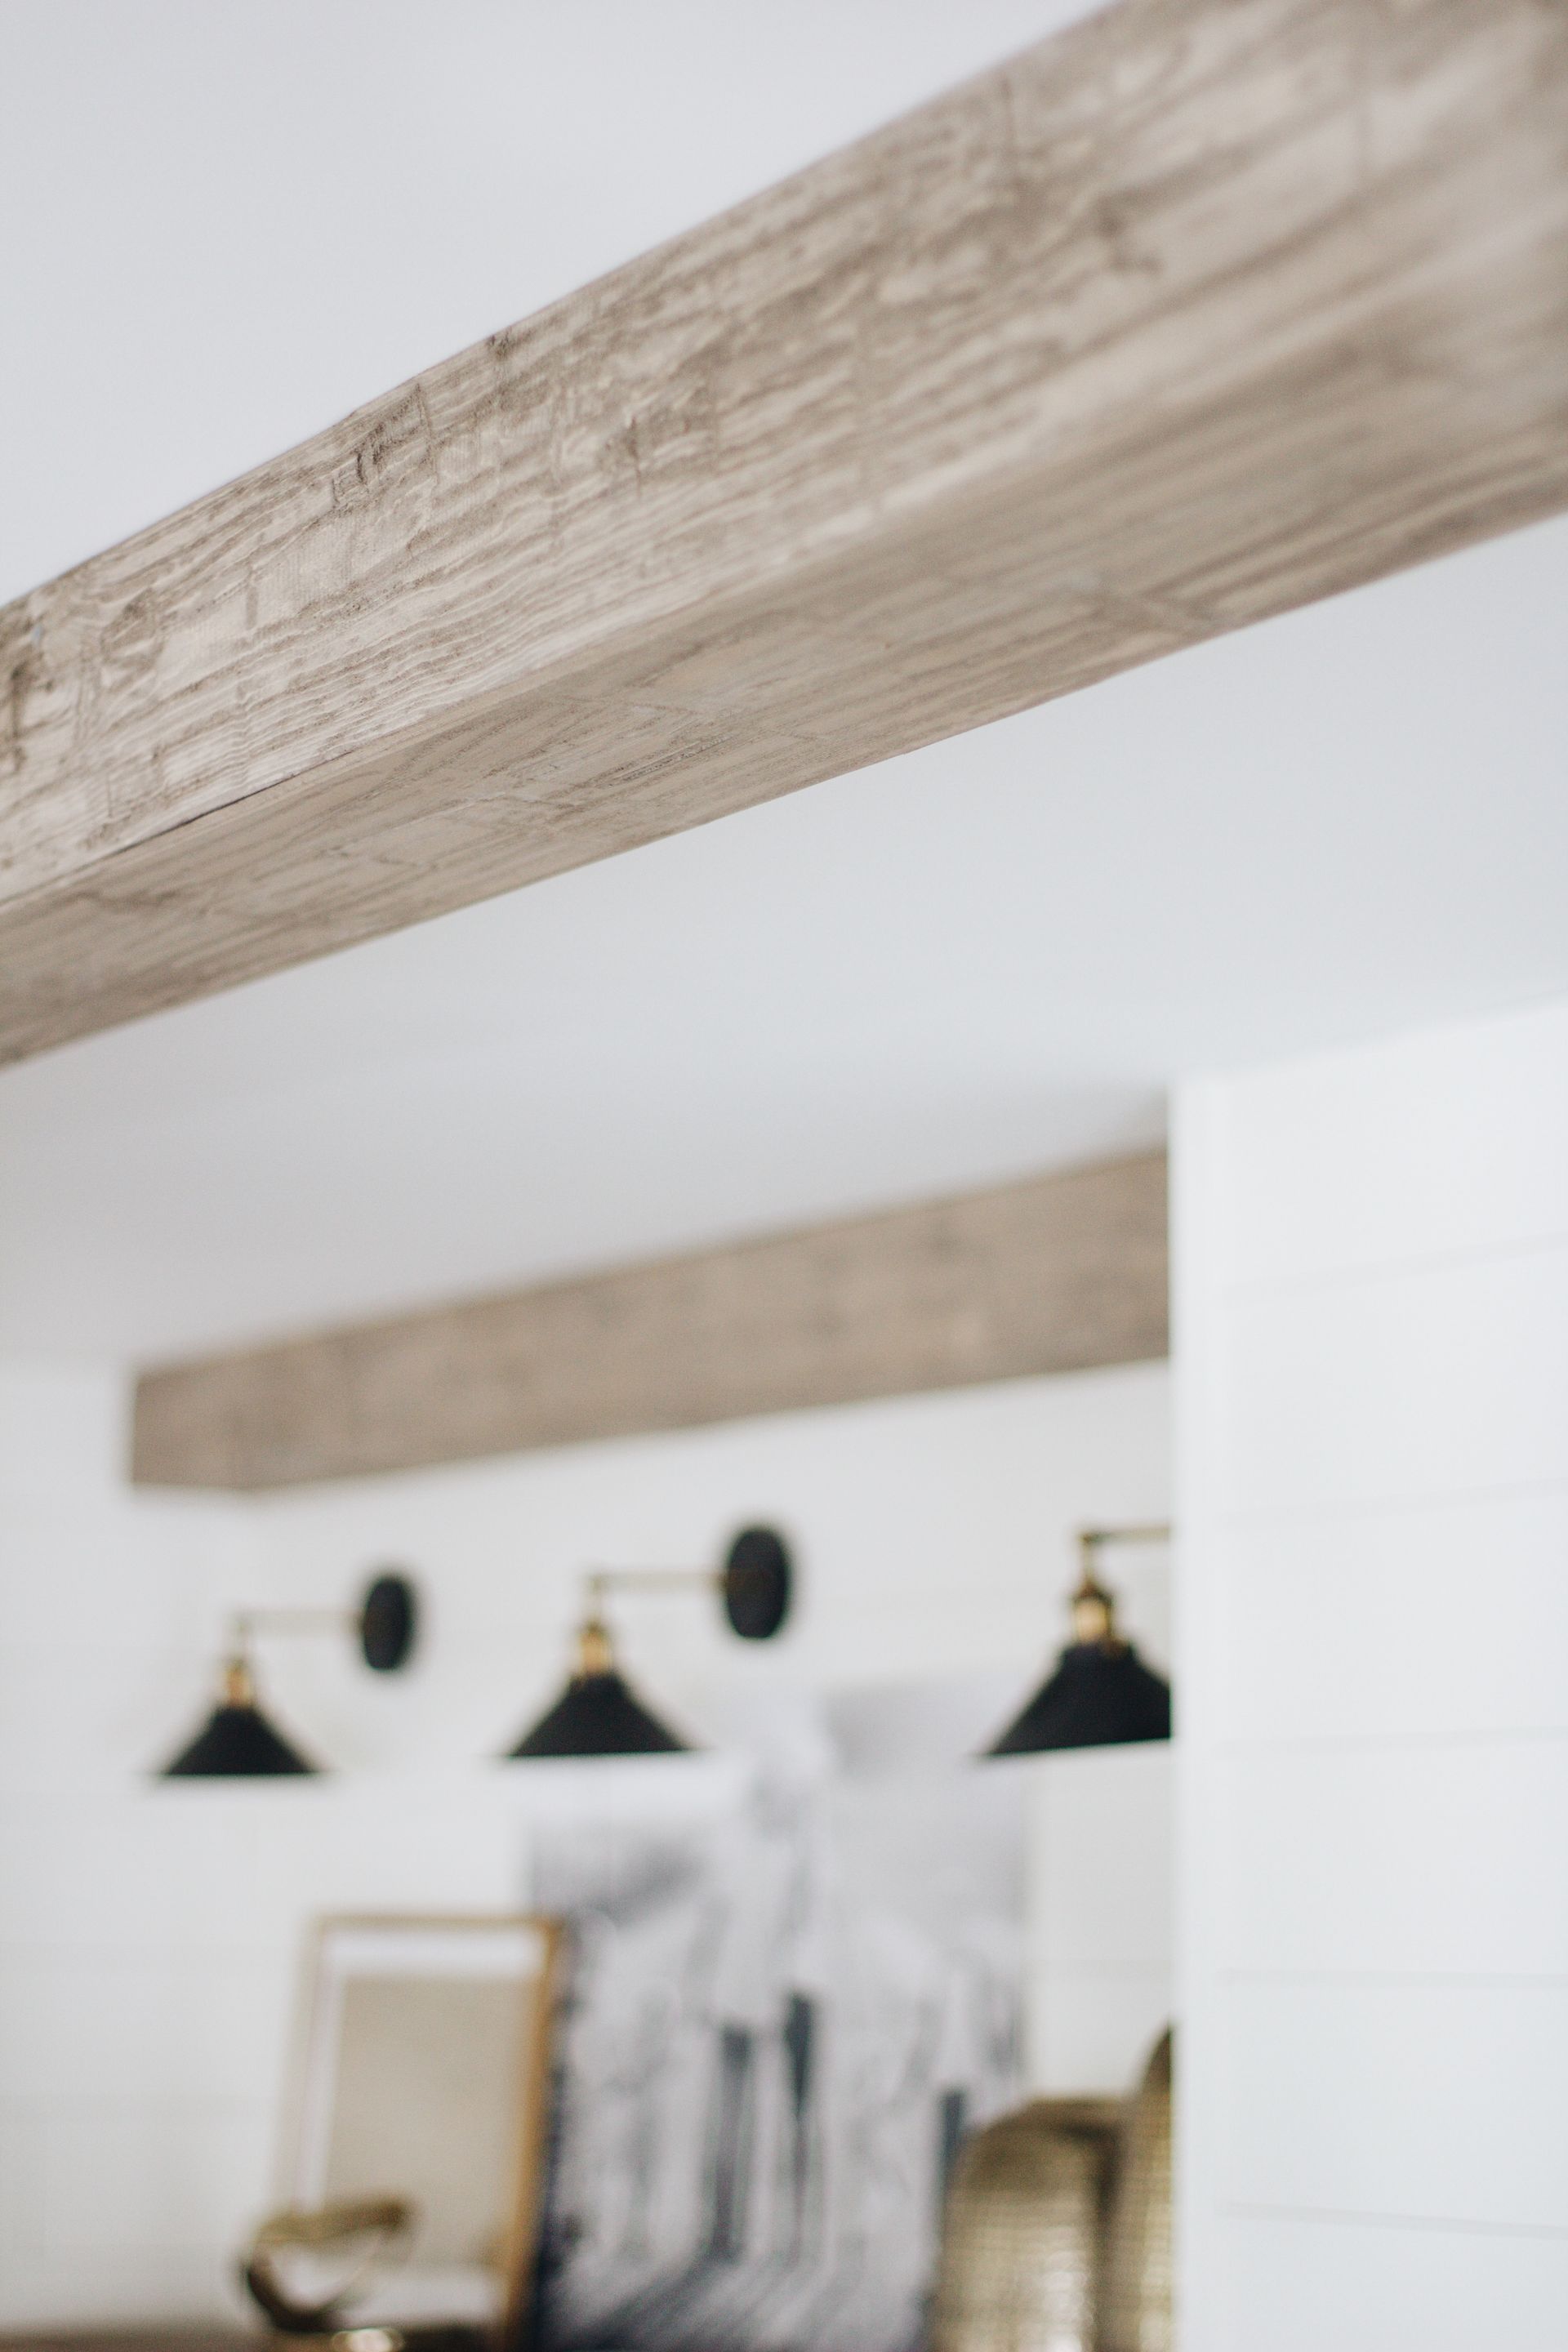
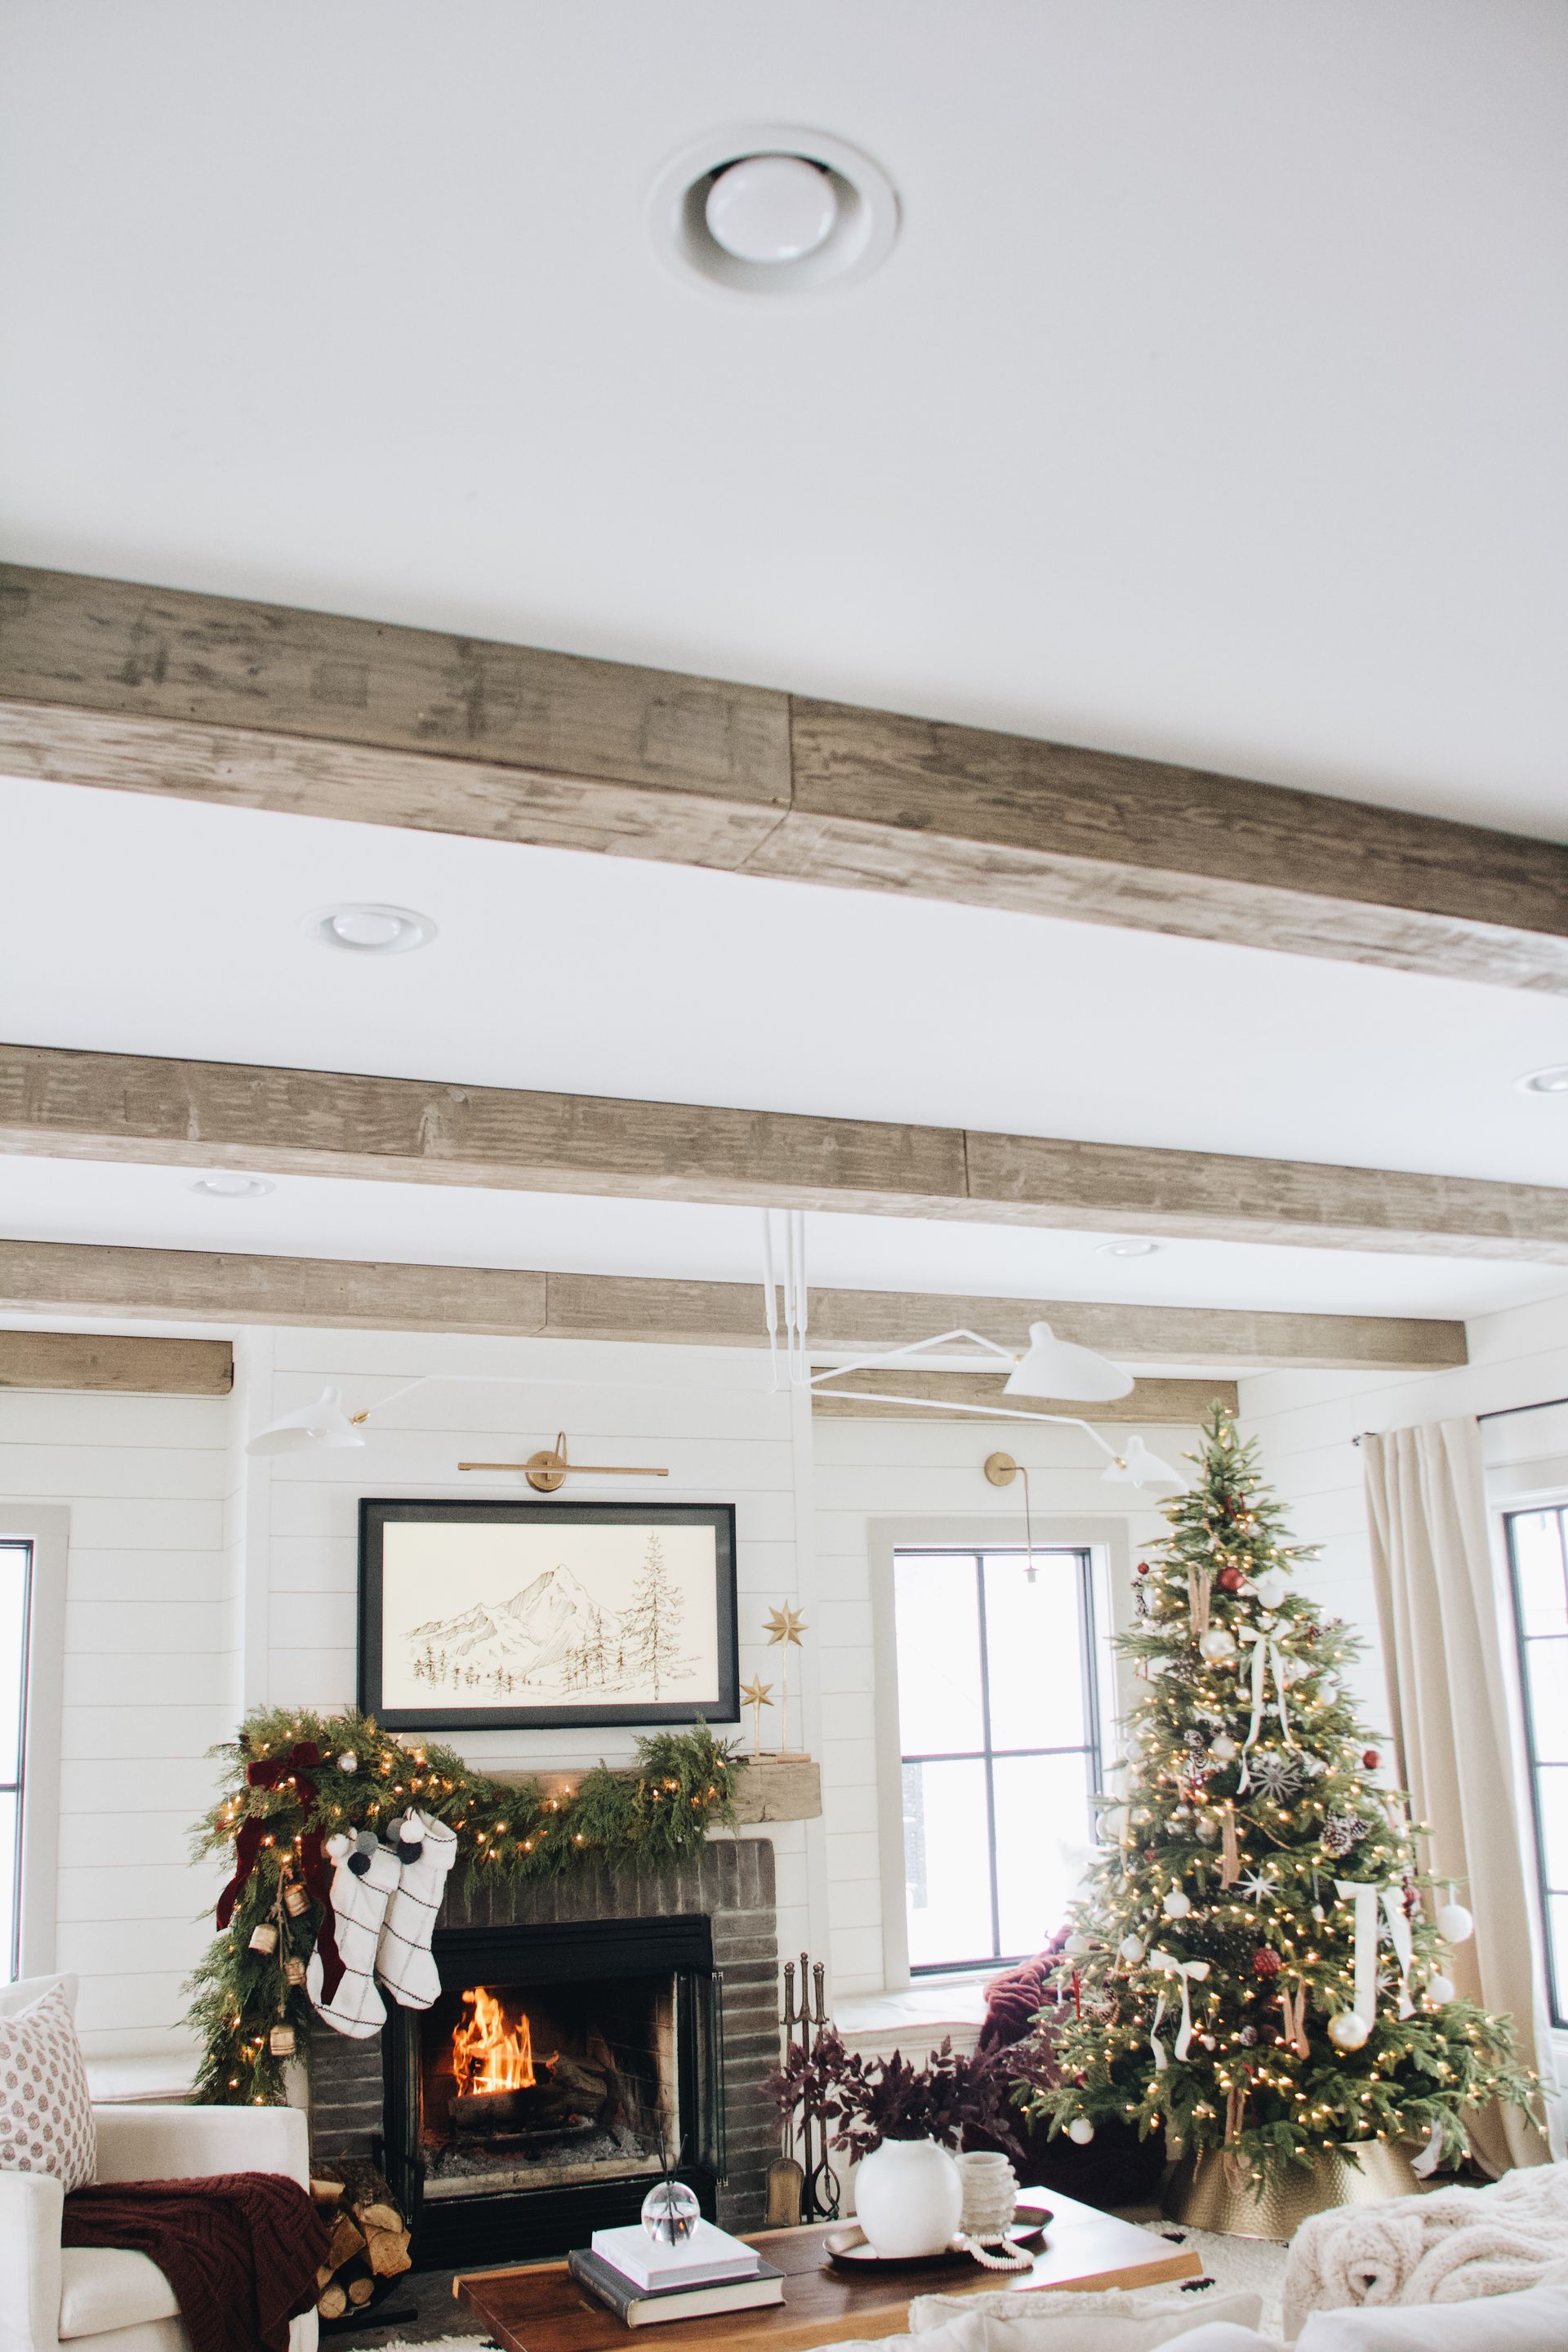
After
I am in LOVE!!!! 20 ft. each and I love every single part of each one.
Surprisingly I think it makes the room feel bigger! The contrast that is now added to the room takes the cozy vibe to a whole new level!

This whole project cost us just over $500! We saved sooo much money by doing it ourselves and also by using regular pine boards. We priced it out with using foam faux beams and it would have easily cost us over $3000 to buy the beams, and we still would have had to buy the wood to attach it to the ceiling. This was by far my favorite project of the year.....oh wait...it was the first DIY project of the year;) But....it will be hard to beat! Happy beam making!