Crafting Fridays
First of all, I know it’s not Friday, but my friend and I started a new craft day Friday play date. We’ve only done 2 so far, but I had a few crafts that I have done quite a while ago that I still have not shown, so I thought I’d “try” to get a crafting blog out every Friday. We’ll see how that goes:)
Today I’m going to show you the free art I made for our dining room. I’m not a huge fan of actual art but do love stuff on the walls. I also don’t have a large budget for art, so this project only cost me $3 worth of wall hangers and the rest of the supplies I already had.
The wood I used was actually part of one of the shelves in our master bedroom closet. Note to self: never burn or toss old wood that can be crafted…especially if you like the color of it. Old wood is like precious diamonds. Okay, that may be a bit extreme, but nonetheless, you can’t just go to the Home Depot and buy some 30 year old wood. So, we had a few boards that I managed to measure and cut with the circular saw without losing a limb…a near miss, but no missing limb:) Here’s how I created this craft..
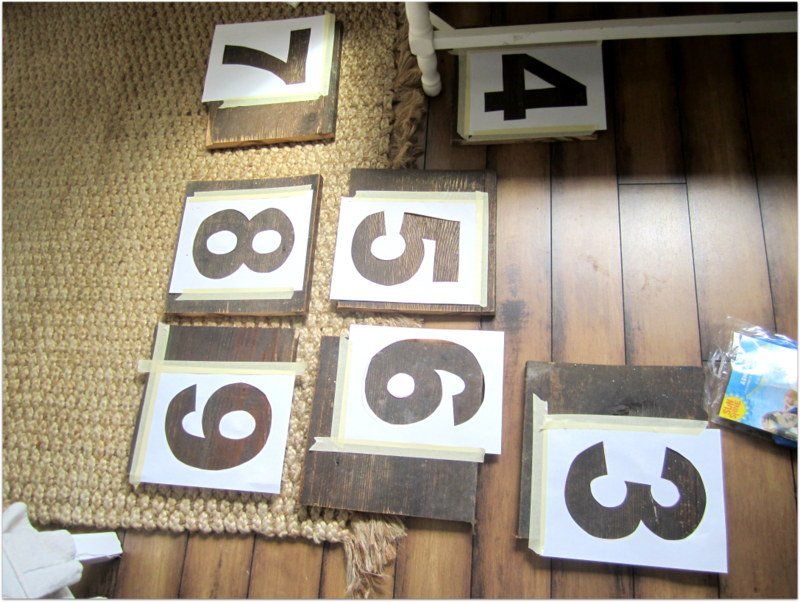
1.) I cut 9 squares that were about 14″ x 14″.
2.) Then I found a number font on the computer I liked and printed out the numbers 1-9 in a font that covered most of the wood.
3.) I cut out the numbers and taped them onto the wood squares in random ways. If randomness bugs you, you can center them all.
4.) I stenciled with white paint onto the boards. You can buy these little foam stencil brushes at walmart, jo-anns, any craft store for very cheap.
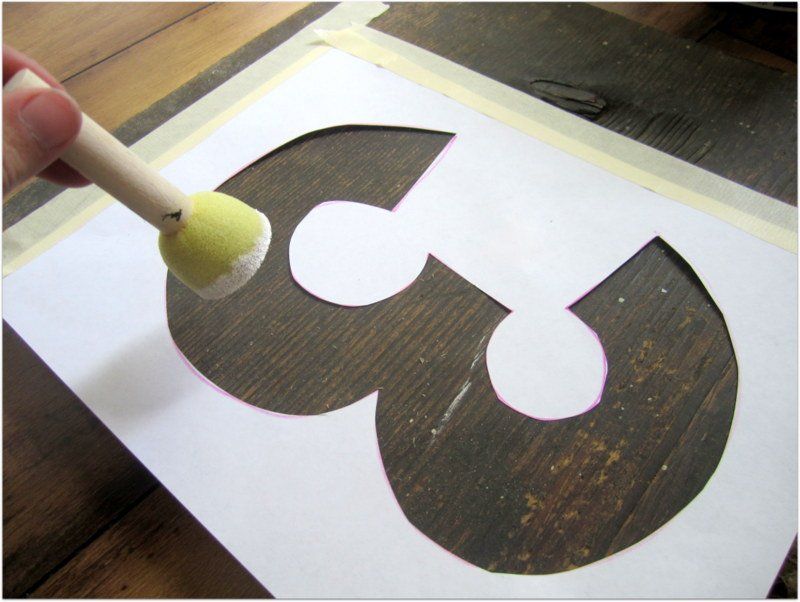
just make sure you tap our stencil brush a few times on a piece of paper towel to get the excess paint off. When I was finished it looked like this..
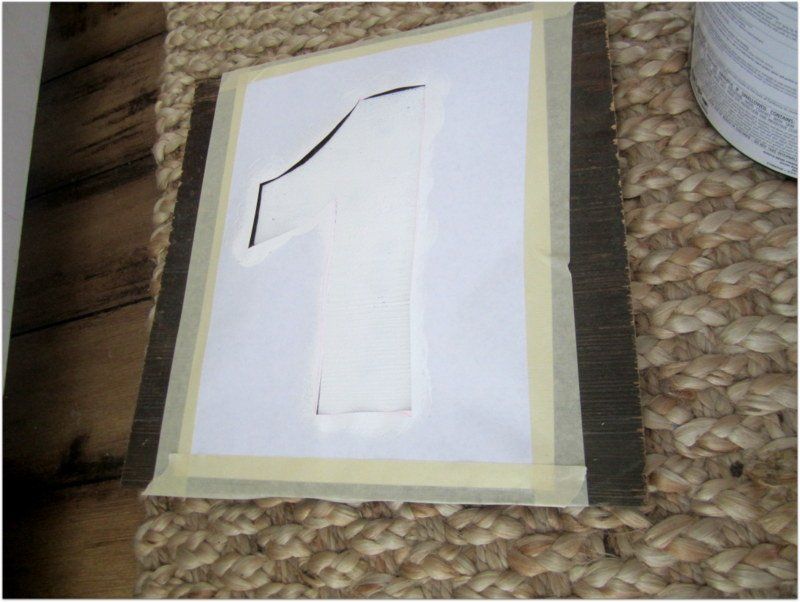
5.) Peel off the paper and let dry.
6.) Take a power sander or a sanding square and rough up the wood and painted numbers. I don’t have a picture of actually doing this, but I ran my power sander right over the number and then also hit the edges hard with it to distress it more.
7.) Add wall hangers on the back of each one. I bought a 6 pack at walmart for $1.97 and they worked great.
8.) Hang and enjoy!
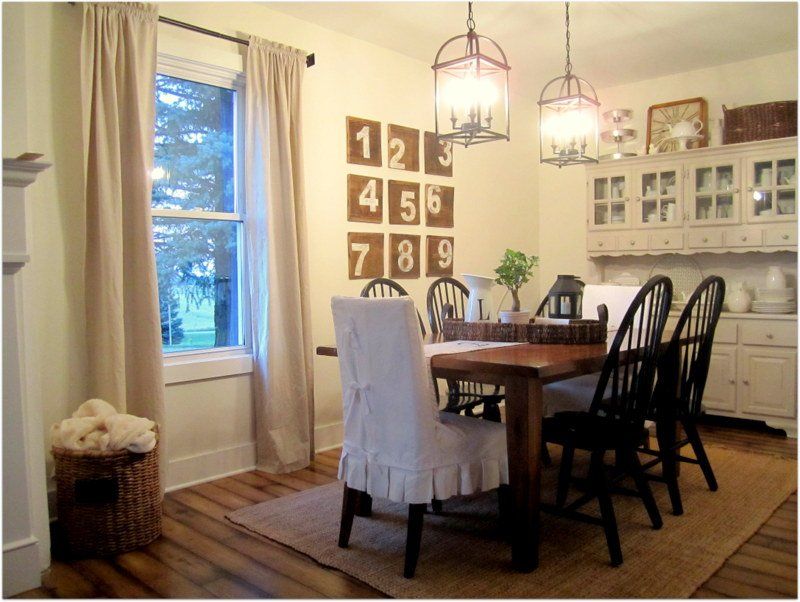
I realize I should have waited until daytime to take better pictures, so please excuse the poor lighting, but I love how it fills the whole space and only cost $4!
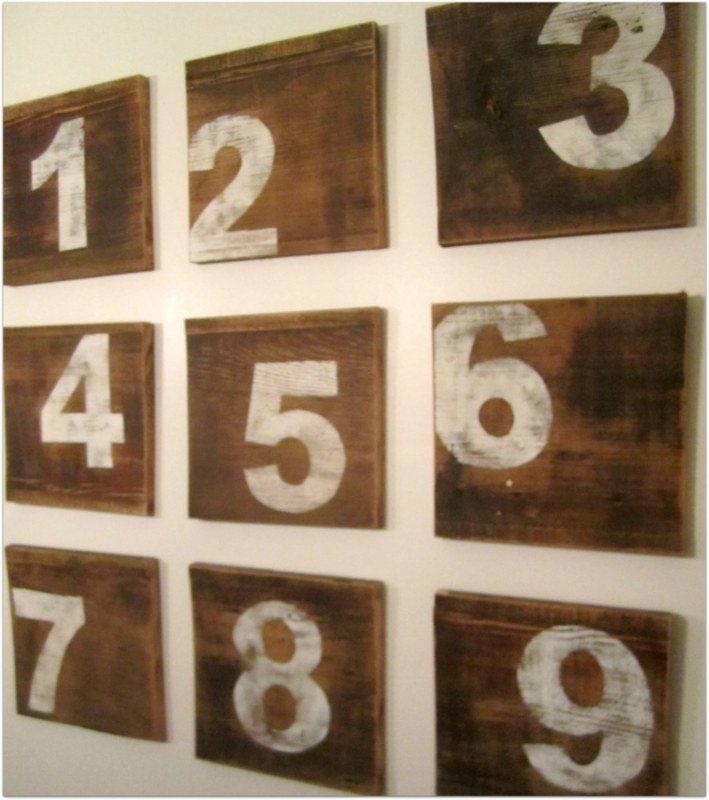
A close-up of the distressing. This wood had a dark stain on it to start with and then when I sanded it, it gave it more definition. If you wanted yours darker and didn’t have stained wood, you could just stain over the top of the numbers.
Ryan informed me that not all of my numbers were centered. Thanks babe:)
Cheap wall art, crafting day #1. enjoy!